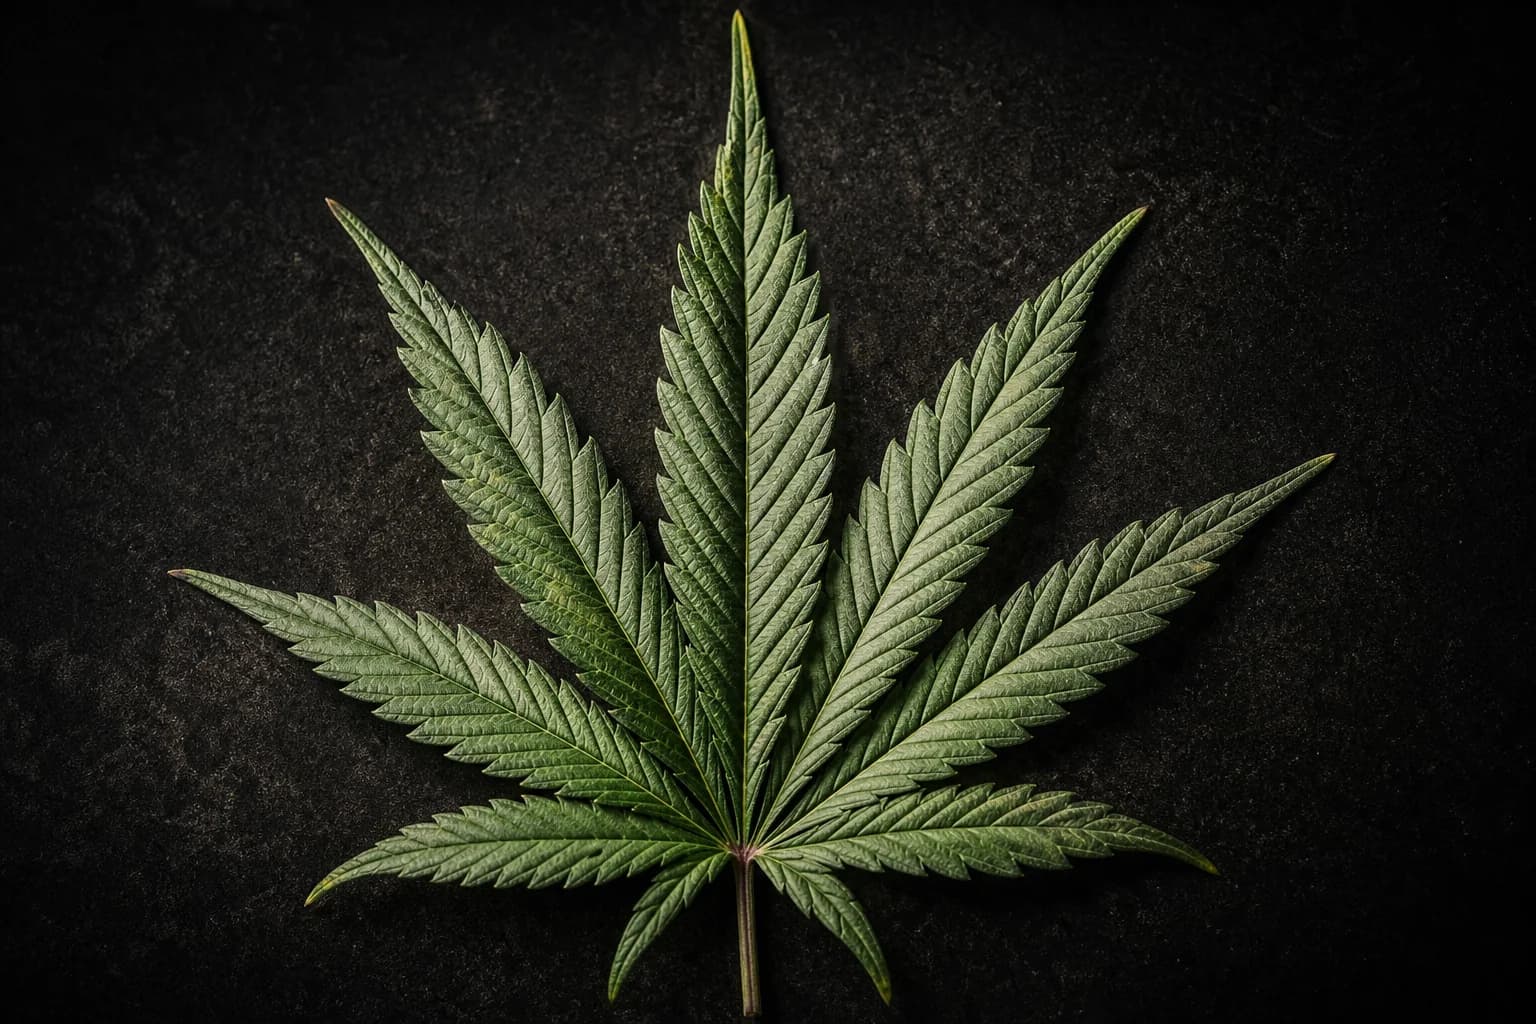
Every Part of the Plant
Cannabis Plant Anatomy
Cannabis Flowering Stage: Week-by-Week Guide for Canadian Growers
The cannabis flowering stage week by week: stretch, bud development, ripening, and how to time everything for Canadian indoor and outdoor grows.
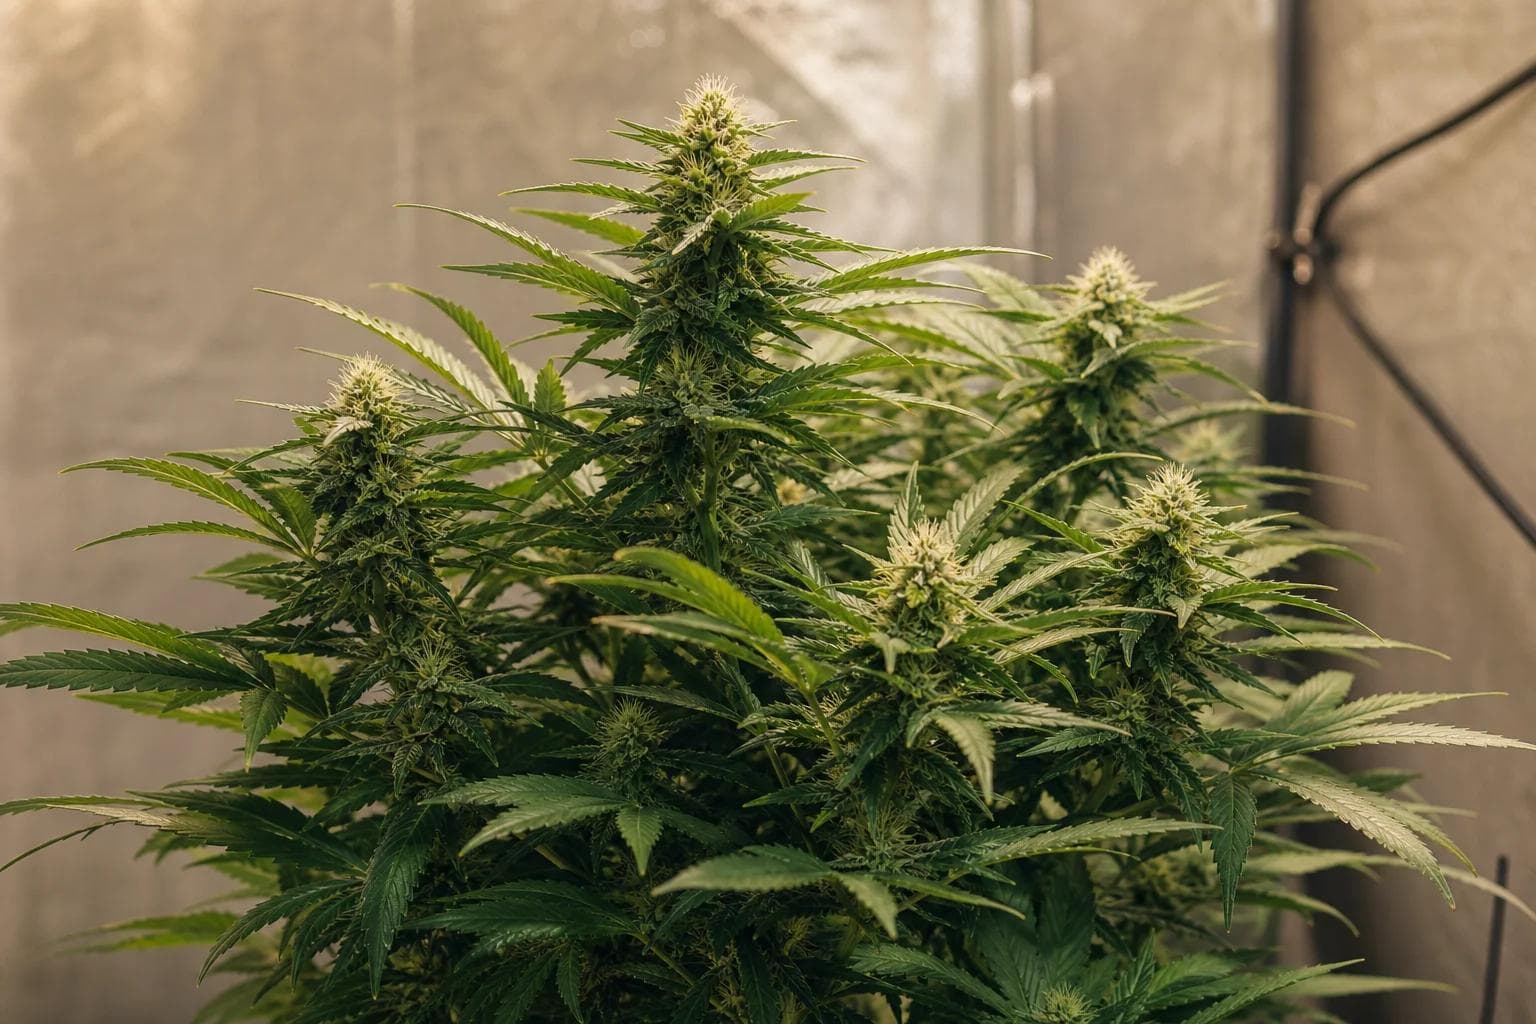
Cannabis flowering lasts 7–11 weeks for photoperiod strains and 5–9 weeks for autoflowers. Triggered by a 12/12 light schedule indoors or shortening days after the summer solstice outdoors, this is the stage where trichomes, terpenes, and cannabinoids develop. Canadian growers must manage autumn humidity spikes, frost-date deadlines, and Botrytis cinerea risk that generic guides never address.
For most Canadian home growers — whether you're running a 4×4 tent in a Toronto basement, a backyard grow in Vancouver, or a garage setup in Calgary — knowing what flowering weed looks and behaves like week by week is the difference between a successful harvest and a crop that falls apart. The parameters shift, the plant's nutritional needs change, and the environmental risks become real. A Southern Ontario plant entering week 7 of flowering in mid-September is operating in 80%+ overnight RH. A Prairie grower's outdoor plants may have 10 days before first frost when they're still in week 6. Generic week-by-week guides won't help you navigate that. This one will.
How long is the cannabis flowering stage?
The cannabis flowering stage lasts 7–11 weeks for photoperiod strains — indica-dominant varieties typically finish in 7–9 weeks, while sativa-dominant genetics can run 10–13 weeks. Autoflowering varieties spend 5–9 weeks in flower within a total lifecycle of 8–11 weeks from seed. Knowing your strain's stated flower time is the baseline for every outdoor harvest deadline and indoor scheduling decision.
For Canadian growers, that range carries direct consequences. A 10-week photoperiod strain starting to flower in early August in Montreal will target a mid-October harvest — colliding with average first frost in most of Quebec. A 7-week fast-version strain starting in early August harvests by late September, comfortably ahead of that window.
What triggers flowering — and how does it differ indoors vs outdoors in Canada?
Flowering is triggered by the length of the dark period. Indoors, you control it by switching your light schedule to 12 hours on / 12 hours off (12/12). The plant detects the uninterrupted 12-hour dark period and begins its hormonal transition to reproduction. Outdoors, the summer solstice (approximately June 21) is the pivot point: from that date forward, days shorten. At Canadian latitudes (roughly 43°N–57°N), daylight drops below the 14-hour threshold in late July, and most strains begin showing pre-flowers in early to mid-August.
Autoflowering cannabis works on a completely different clock. It flowers based on age — typically at 3–5 weeks from seed — regardless of light schedule. You can run autoflowers on 18–20 hours of light straight through, and they'll begin flowering on their own timeline. For outdoor Canadian growers, this removes the frost-date equation almost entirely: an autoflower started in late May is harvesting in late July or August, well ahead of September bud rot risk and October frost.
Week 1: What happens in the first week of cannabis flowering?
Indoor: The first 48–72 hours after a 12/12 flip are a hormonal transition period. The plant is receiving the new light signal but has not yet committed to flowering. By the end of week 1, most strains show the first pre-flowers — tiny white pistils emerging at the internodes between stem and branch. These hair-like structures are the first visual confirmation of flowering.
Outdoor (Canadian context): For plants in Southern Ontario or Quebec, week 1 of flowering corresponds to late July to early August. The trigger is the natural progression of shortening daylight after the summer solstice. Watch for pistil emergence at bud sites — that's your confirmation the clock has started.
What to do this week: Maintain stability. Resist any urge to make dramatic changes — a flowering weed plant mid-transition doesn't need interference. Target 24–26°C with 55–60% RH. Keep your vegetative nutrient schedule for the first 5–7 days before transitioning to a bloom-oriented formula. Your VPD/humidity/temperature guide will show week-1 VPD targets around 0.8–1.0 kPa — manageable in most tents without heavy environmental control.
Week 2: Why does the cannabis plant stretch so rapidly in early flower?
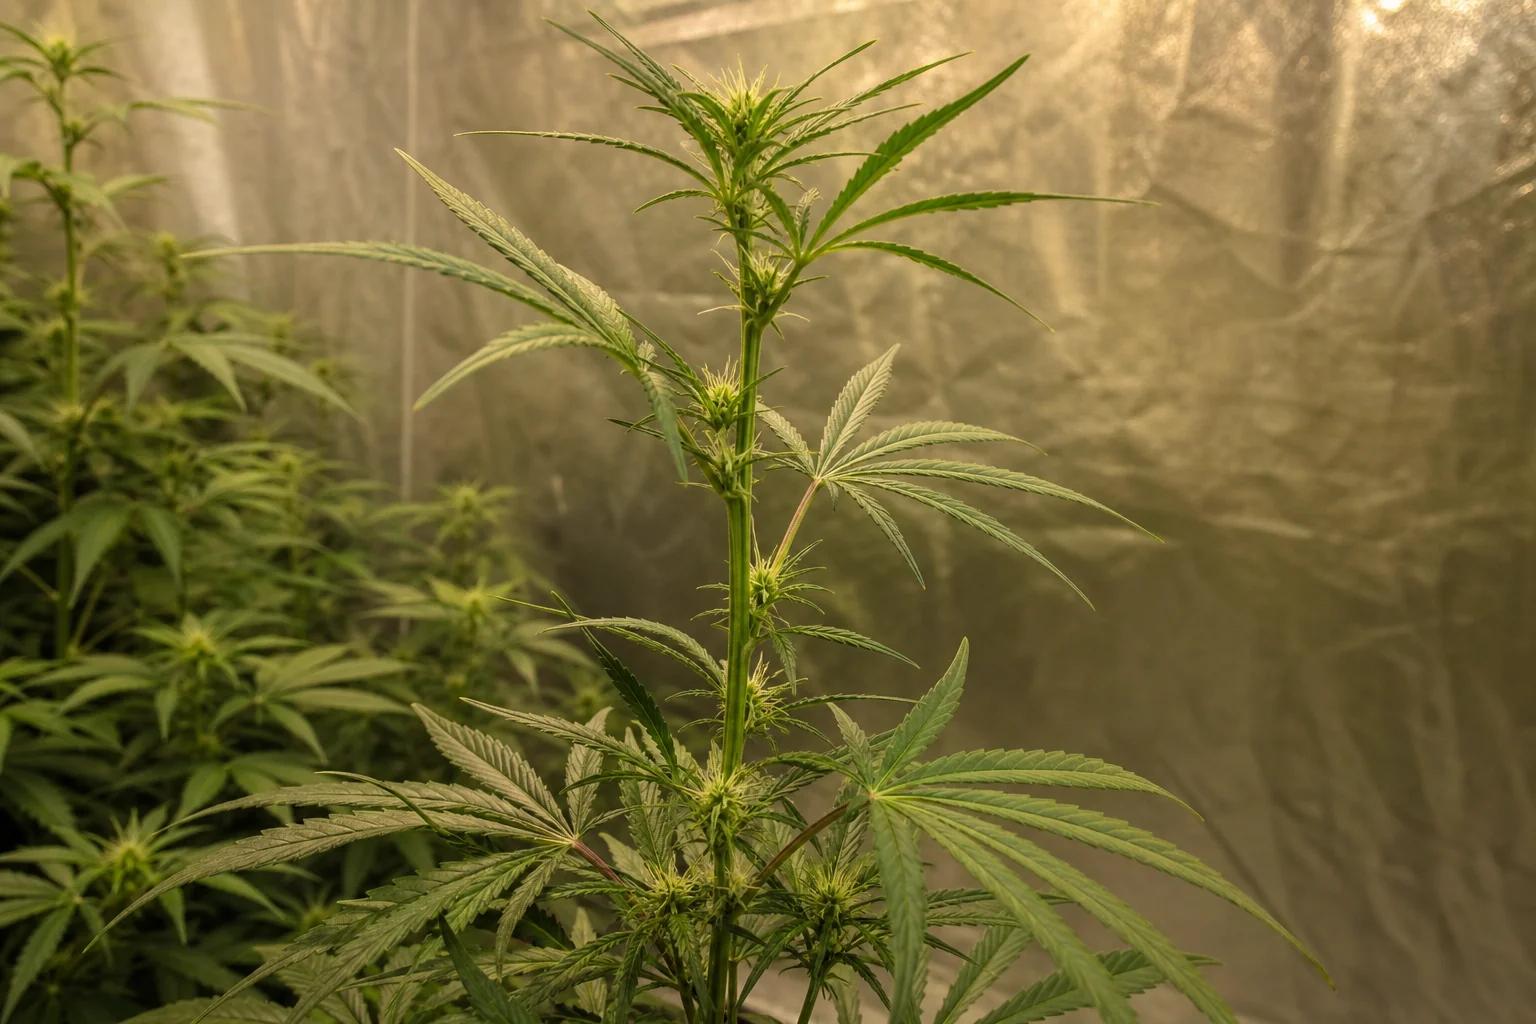
The stretch is a hormonally-driven rapid vertical growth phase. Following the light-cycle trigger, cannabis produces a surge of gibberellin and auxin hormones that extend internodal spacing — the plant is literally building architecture for bud sites before committing energy to flower production. In week 2, some sativa-dominant or long-flowering genetics can add 3–5 cm per day. Most plants will double their height by the end of week 3.
Why this matters for Canadian indoor growers: If you flipped to 12/12 when plants were already 60–70 cm tall in a standard 200–240 cm tent, the stretch can push you into heat and light burn territory by week 3. The standard rule is to flip when plants are at roughly half your available vertical space after accounting for light clearance. If you missed that window and you're already running tight on headroom, lower your light now — don't wait for bleaching or burn to appear.
Outdoors, the stretch phase is visible in early-to-mid August: stems lengthen visibly, the canopy opens, and bud sites become prominent along every branch junction.
Week 3: Should I defoliate during the flowering stretch?
Yes — week 3 is the most effective defoliation window in the entire flowering stage. Remove large fan leaves blocking bud sites and lower-canopy foliage receiving minimal direct light. The plant's energy redirects toward upper flowering sites, improving light penetration and air circulation — both critical for preventing late-flower bud rot in humid Canadian climates.
This is a targeted pass, not a strip. Remove 20–30% of foliage maximum. Heavy defoliation during an active hormonal stretch stresses the plant and delays development. See the defoliation guide for full technique and timing specifics — including the week 6 secondary pass that's particularly valuable for dense-canopy Canadian basement grows.
Week 4: When does the stretch end and real bud development begin?
By week 4, vertical growth decelerates sharply — the stretch is over. This is the point where flowering weed shifts its energy from structure to production. Calyx stacking begins: each bud site starts building layer upon layer of calyxes, forming the structural foundation of the flower. Pistils are now dense and prominent. The plant's silhouette shifts from open and leafy to structured and nodal.
This is the pivot week for nutrition. Shift your programme decisively toward bloom: reduce nitrogen, increase phosphorus and potassium. Your nutrient feeding guide specifies EC targets for bloom phase — for coco or soilless growers, most bloom schedules target 1.8–2.2 EC at this stage. Monitor runoff values carefully before chasing higher input EC.
Begin lowering RH toward 50–55%. The canopy is densifying, and starting the humidity descent now is far more effective than trying to emergency-dehumidify in week 7.
Week 5: What week of flowering do cannabis buds grow the most?
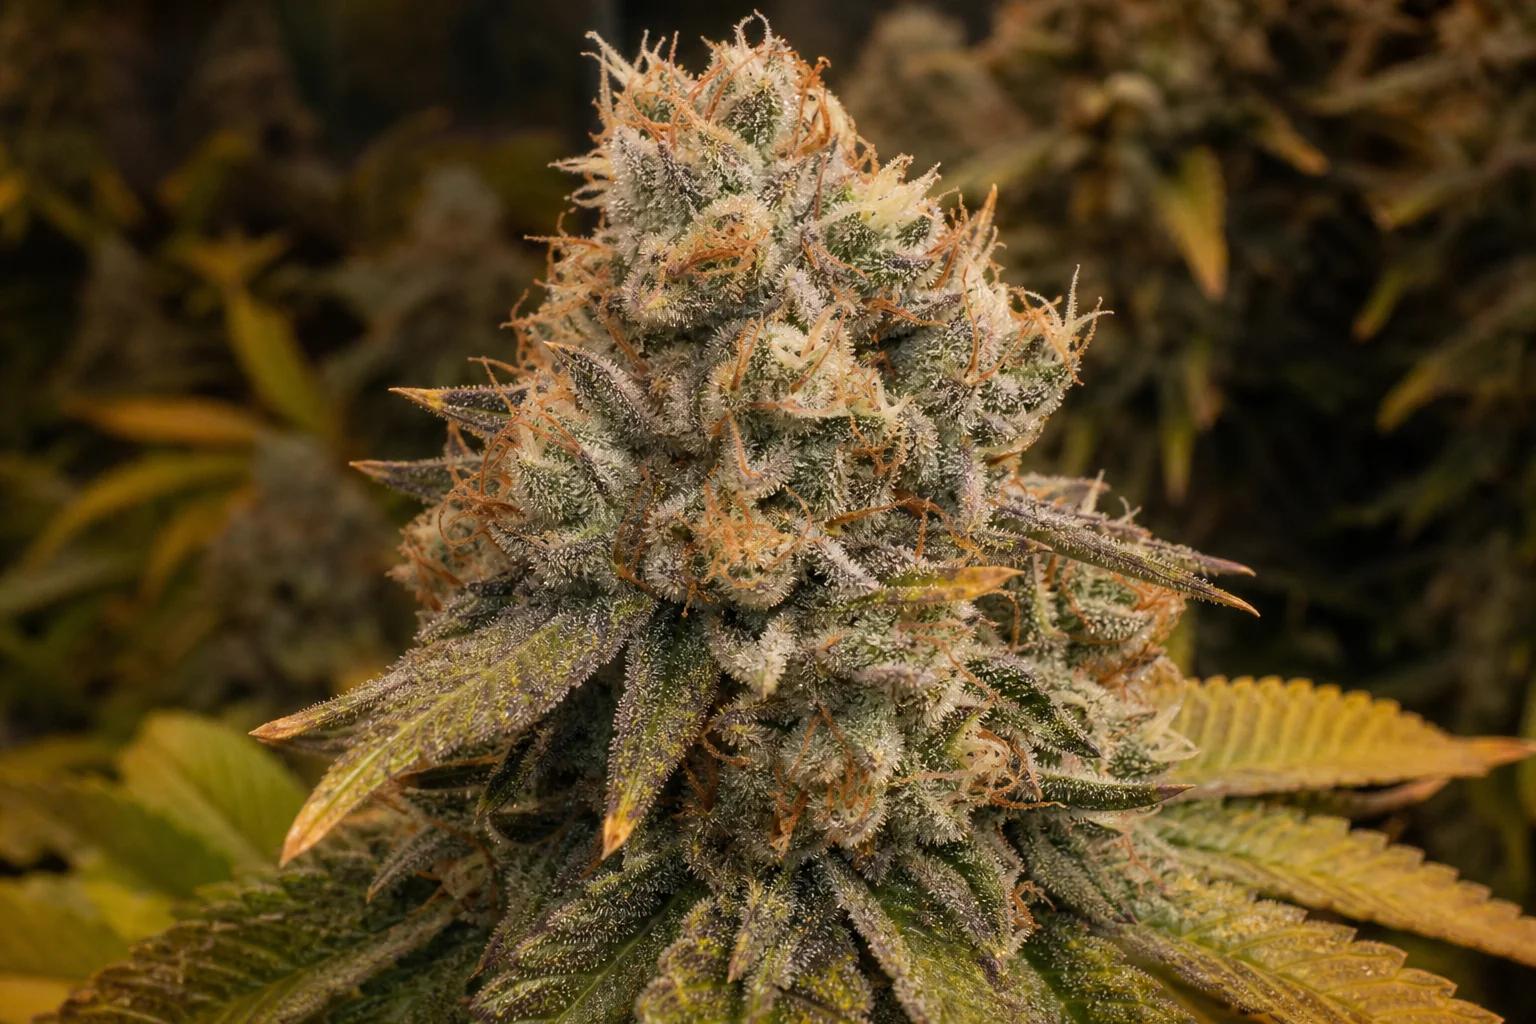
Weeks 5 and 6 are the primary bulk-building window — calyx-on-calyx stacking accelerates through this period, and this is where you'll observe the most dramatic visual change in a flowering weed plant's bud mass. Trichomes begin appearing as a fine frosting on calyxes and sugar leaves. Under magnification, they're predominantly clear at this stage, indicating cannabinoid synthesis is underway but not complete.
For growers in Montreal or Toronto monitoring an outdoor photoperiod crop, week 5 of flowering corresponds to early-to-mid September — when daytime temperatures remain warm but overnight lows drop toward 10–15°C. That temperature differential encourages trichome development but also forces condensation on dense bud surfaces. Monitor your canopy RH in the early morning, not mid-day — that's when you'll see your true humidity load.
Begin or confirm your phosphorus–potassium boost this week. A dedicated PK additive — or a P/K-heavy bloom formula — supports calyx density and resin gland development through weeks 5–7. Apply per your nutrient brand's schedule.
Week 6: When should I start a PK boost and drop humidity?
Week 6 is where resin production ramps hard on a flowering weed plant and the bud rot window opens for Canadian outdoor and humid indoor growers.
If you haven't started your PK boost yet, now is the last good window. Trichome heads are developing, the plant's demand for phosphorus is at its peak, and a nitrogen-dominant feed at this stage produces exactly the loose, leafy bud structure you're trying to avoid. Maintain EC in the 1.8–2.2 range for coco/soilless. Runoff EC creeping above 3.0 signals salt accumulation — flush lightly and reduce input EC.
Check your pH guide targets: 5.8–6.2 in coco, 6.0–6.5 in soil. Phosphorus locks out below pH 5.6 and above pH 7.0 — a pH drift is often the real culprit behind poor bud density in week 6.
Humidity management is now urgent: Drop RH to 45–50%. For outdoor growers in Southern Ontario, Quebec, and Atlantic Canada, September's maritime and Great Lakes humidity regularly pushes 75–85% overnight — exactly when your buds are densest and most vulnerable. This is the window where Botrytis cinerea establishes itself inside dense colas before you can see it. See bud rot prevention for a full prevention protocol.
Week 7: What does late-flower bud rot look like — and how do I prevent it in Canada?
By week 7, buds are dense, resinous, and full of trapped moisture. Botrytis cinerea — the grey mould responsible for bud rot — exploits exactly this environment . It doesn't need a wound or an entry point. It needs moisture, slightly cool temperatures, and still air.
Visual signals:
- Brownish or grey matter inside the bud, only visible when you open a cola — the first sign is often one browning pistil cluster surrounded by otherwise healthy tissue
- Greyish-white fuzzy mould visible on exterior surfaces of very dense buds
- Premature pistil browning in a localized area — not across the whole plant, just one bud site (see the pistils guide for how to distinguish rot-related browning from natural late-flower maturation)
- Indoor: Run RH at or below 45%. A dedicated dehumidifier is non-negotiable in a basement tent during a Canadian autumn. Run it overnight — that's when RH naturally peaks.
- Outdoor (BC Interior, Ontario, Atlantic): A simple plastic-sheeted hoop cover or lean-to greenhouse shelter prevents overnight dew accumulation on outdoor plants in September. BC Interior growers with dry autumns have it easiest; Atlantic and Southern Ontario growers are dealing with the highest humidity pressure in Canada.
- Airflow: Oscillating fans preventing air stagnation inside the canopy are your primary tool. Complement this with the week 6 defoliation pass.
- Infected material: Remove immediately and dispose of away from the grow space. Botrytis spreads by spore — cutting into an affected bud releases thousands of them.
Weeks 8–10: How do I handle ripening, flushing, and the final harvest check?
These are the terminal weeks — the endgame for any flowering weed plant, where every input decision either adds or subtracts from final quality.
Week 8: Most indica-dominant strains are approaching harvest. Sugar leaves begin to yellow and curl inward — this is normal senescence as the plant pulls mobile nutrients from foliage. Lignification progresses in the stems: the main stalk firms up and takes on a woody texture, a visible signal the plant is allocating carbon to structure rather than growth. Trichomes are transitioning from clear to milky/cloudy. Pistils are 60–70% amber.
Flushing (1–2 weeks before your target harvest): Flush with pH-balanced water to clear residual mineral salts from the medium. Soil growers: 10–14 days of water only. Coco/soilless growers: 7–10 days. Hydro growers: 5–7 days. Monitor runoff EC — when it approaches input EC (typically 0.3–0.5 for plain water), the medium is flushed.
Harvest window signals (weeks 9–10):
- Trichomes on calyxes: 70–90% cloudy, 10–30% amber for peak effect profile
- Pistils: 75–90% darkened to orange-brown
- Calyxes: swollen and firm; buds feel dense and don't compress easily
Canadian outdoor urgency note: In Prairie regions — Calgary, Edmonton, Winnipeg — average first frost arrives as early as mid-September. A photoperiod plant in week 8 of flowering on September 10 has 5–10 days of safe growing weather at most. If frost is 10 days out and trichomes are still mostly clear, harvesting early beats losing the entire crop. Dry the harvest slowly at 15–18°C to allow some continued terpene development post-cut.
What temperature and humidity should I run during flowering?
The flowering stage breaks into three distinct environmental phases. Each phase has different plant priorities and therefore different targets.
PPFD targets for indoor flowering: 600–800 μmol/m²/s in early flower; scale to 800–1,000 μmol/m²/s in mid-flower for plants acclimatized to higher light intensity. A 4×4 tent with a 480W LED quantum board or 600W HPS at proper mounting height will hit this range. Running below 600 μmol/m²/s through weeks 4–7 is a primary cause of airy, under-developed buds in home grows.
When does cannabis start flowering outdoors in Canada?
Outdoor cannabis flowering is triggered when the dark period consistently exceeds 10–12 hours — corresponding to days shorter than roughly 14 hours of light. After the autumnal equinox (September 21), days are shorter than nights across the entire Northern Hemisphere, and outdoor plants in flower are well into mid-to-late stage. But the trigger happens much earlier than that: at most Canadian latitudes, daylight crosses the flowering threshold in late July, meaning pre-flowers appear in early August for most regions.
See the outdoor Canada calendar for full growing season planning by province.
Do autoflowers have a flowering stage?
Yes — autoflowering cannabis has a complete flowering stage lasting 5–9 weeks, beginning automatically at roughly 3–5 weeks from seed regardless of light schedule. The total lifecycle runs 8–11 weeks from germination to harvest. Because flowering is age-triggered rather than photoperiod-triggered, autoflowers can run on 18–20 hours of light throughout, and the frost-date pressure is nearly eliminated for Canadian outdoor growers.
An autoflower started outdoors in late May in Winnipeg or Quebec City will begin flowering in late June and harvest in late July to early August — well before the September–October frost window. For growers in short-season regions working within Health Canada's 4-plant household allowance, autoflowering genetics are the most reliable path to a completed outdoor harvest. See the autoflower growing guide for full lifecycle guidance.
Should I defoliate during flowering?
Strategic defoliation on a flowering weed plant improves light penetration to lower bud sites, reduces humidity pockets inside the canopy, and significantly lowers Botrytis cinerea risk in Canadian autumn conditions. Two windows are most effective: week 3 (late-stretch — open the canopy before bud structure solidifies) and week 6 (a lighter airflow pass before the bud rot window peaks). After week 7, leave it alone — the plant is burning every available resource toward ripening, and a defoliation stress at this stage costs you more than any humidity savings would recover. Remove 20–30% of foliage per pass, maximum.
What's the ideal pH for flowering cannabis?
The ideal pH for cannabis during flowering is 5.8–6.2 in coco and soilless media and 6.0–6.5 in organic soil. Phosphorus — the nutrient most critical for bud density and resin production in weeks 4–8 — is most available between pH 6.0 and 7.0. A pH drift below 5.6 or above 7.2 causes phosphorus lockout, resulting in airy, underdeveloped buds regardless of how much PK product you're running. Check runoff pH at every other watering through mid-to-late flower. Full guidance at pH guide.
When should I flush before harvest?
Begin flushing 1–2 weeks before your planned harvest date. For soil growers: 10–14 days of pH-balanced water only. For coco or soilless: 7–10 days. For hydro: 5–7 days. The goal is to clear residual mineral salts from the medium, not to "purge" the plant. Monitor runoff EC — when it drops to within 0.3–0.5 EC of your input water, the medium is flushed and harvest can proceed.
Canadian outdoor growers: If frost is 10–14 days away, begin your flush now regardless of trichome maturity. A crop lost to a hard freeze yields nothing — a slightly early harvest of almost-mature buds is always preferable to zero.
Why aren't my cannabis buds fattening up?
This diagnostic question appears in weeks 5–7 for most growers and almost always traces to one of four causes:
1. Insufficient light intensity (most common indoor cause) Cannabis buds require 800–1,000 μmol/m²/s PPFD to stack calyxes efficiently in mid-flower. Underpowered lights or lights positioned too far from the canopy produce elongated, airy calyxes with poor density. If you can't measure PPFD directly, check that your light covers the full footprint of your grow space at the manufacturer's recommended hanging height.
2. PK feeding absent or mistimed Still running a veg-balanced formula through week 5? Calyx stacking will be slow. Phosphorus drives calyx production; potassium supports cell wall integrity and resin gland development. Introduce a dedicated PK product and reassess after 7 days.
3. Root health and dry-back problems Restricted nutrient uptake from overwatering, root rot, or salt-locked coco all manifest as slow bud development even with perfect inputs. In coco, target a dry-back to 35–40% moisture content between feeds. If pots aren't drying, reduce feed volume and increase frequency — more smaller feeds, not fewer large ones.
4. Daytime temperatures too high Temperatures above 28–30°C suppress trichome and resin development and can cause foxtailing — long, spindly bud extensions with almost no calyx density. This is rarely an issue for outdoor growers in Canada in September, but indoor summer grows in non-air-conditioned Toronto or Vancouver apartments regularly hit this threshold. A clip-on thermometer inside the tent canopy (not just at the intake) gives you accurate readings.
How do I know my cannabis plant is ready to harvest?
Harvest readiness on a flowering weed plant is confirmed by trichome inspection, not the calendar. Under 60–100x magnification (jeweller's loupe or digital microscope), examine the trichomes on the calyxes themselves — not the sugar leaves, which mature and amber faster than the buds:
- Clear trichomes = not ready. Cannabinoid synthesis is incomplete.
- Cloudy / milky trichomes = peak THC. Harvest here for maximum potency and a more energetic effect profile.
- Amber trichomes = THC converting to CBN. More sedative, body-heavy. Most growers harvest at 10–30% amber for balance.
Which short-flowering strains work best for Canadian growers?
For growers in Quebec City, Winnipeg, Edmonton, or any other short-season region — strain selection is the single most impactful decision you make before the grow even starts. The math is unambiguous: a 10-week photoperiod strain is not a viable outdoor choice across most of Canada. You need either a fast-version photoperiod (6–8 weeks of flower, bred for early finishing) or an autoflower (harvest in August regardless of photoperiod).
Fast-version strains are photoperiod genetics selected for abbreviated flower times of 6–8 weeks. They respond normally to 12/12, can be trained like standard photoperiods, and finish before October cold. For Southern Ontario and BC Interior growers with more runway, they offer both the training flexibility of a photoperiod and the seasonal security of an early finish.
Autoflowering strains remove the frost risk entirely. Planted late May, they flower from late June and harvest in late July to early August — avoiding both September's bud rot pressure and October's frost. Under Health Canada's 4-plant household allowance, getting fast-finishing genetics right matters at every plant site.
Premium Genetics for the Canadian flowering window:
- Buy Northern Light Auto Feminized seeds — indica-dominant autoflower with a compact structure and dense, resinous buds. Finishes in 8–9 weeks from seed. Resilient in northern climates and low-light autumn conditions.
- Buy Blueberry Fast Feminized seeds — fast-version photoperiod with 7–8 weeks of flower, a pronounced berry terpene profile, and excellent bud density in humid conditions.
- Buy Wedding Cake Fast Feminized seeds — resin-heavy fast-version with a 7–8 week flower time. Performs well in controlled tent environments and is a late-summer outdoor option for Southern Ontario growers with a clean September forecast.
- Buy Northern Light x Blueberry Auto Feminized seeds — autoflowering hybrid combining Northern Light's structure with a Blueberry terpene character. Ideal for late-May outdoor starts in any Canadian region, targeting a late-July to August harvest.
FAQ
How long is the flowering stage for an indica vs a sativa?
Indica-dominant strains typically flower in 7–9 weeks from the 12/12 flip or pre-flower trigger. Sativa-dominant strains run longer — 9–13 weeks, with some equatorial sativas reaching 14–16 weeks. For most Canadian outdoor growers, this makes pure sativa-dominant photoperiods impractical. Indica-dominant, indica-hybrid, or fast-version genetics are the realistic choices for finishing ahead of October frost.
Can I flower outdoors in Canada and actually finish before frost?
Yes — with the right genetics. Fast-version photoperiod strains (6–8 weeks of flower) starting in early August in Southern Ontario or BC Interior will reach harvest by late September, ahead of average first frost. In Quebec, the Prairies, or Atlantic regions, autoflowering varieties are the more reliable strategy: they flower from seed on a fixed age schedule and harvest in August regardless of photoperiod, completely sidestepping the October deadline.
What's the difference between using pistils and trichomes for harvest timing?
Pistils give you a rough field estimate without tools — 70–80% of pistils darkened to orange or brown indicates you're likely in the harvest window. Trichomes give you the precise signal under magnification: aim for 80–90% milky/cloudy trichomes with 10–20% amber on the calyxes (not the sugar leaves, which amber faster). Use pistils as a first check, trichomes to confirm. See the [LINK: pistils guide | /en/articles/cannabis-pistils-explained] for a full comparison.
Should the lights be on or off when I check trichomes?
Check trichomes with the lights off or with only a handheld torch for illumination. Under full HPS or high-intensity LED, heat and intense light can cause trichome heads to appear milky when they're still predominantly clear. The most accurate readings come from a jeweller's loupe or digital microscope after a dark period, using indirect or cold-white light to illuminate the sample.
Why are my pistils browning in week 4 — is something wrong?
Premature pistil browning in week 4 of a flowering weed plant usually points to one of three causes: heat stress (daytime temperatures above 28–30°C), physical contact (brushing against tent walls, fans, or netting), or the early sign of moisture-driven bud rot in a humid grow space. Check your canopy temperature first. Then inspect the base of any affected bud site — healthy mechanical browning from contact shows no internal discolouration; bud rot shows brown or grey matter inside the calyx structure when you open the bud.
19+ | Educational horticulture only.