
From Seed to Seedling
Germination Guides
Cannabis Seedling Care After Germination — Week-by-Week Guide
Grow healthy cannabis seedlings with step-by-step care instructions. Master light, temperature, humidity, and watering schedules from germination to transplant.
Cannabis seedling care after germination starts with gentle light (CFL or LED, 18–20 hrs), temperatures of 22–26°C, and humidity around 65–70%. Water in small rings every 2–3 days and hold all nutrients until week 2–3. The cotyledons feed your seedling — your job is to protect the environment, not intervene.
Your seeds sprouted. The taproot is down, the cotyledons are pushing toward the light, and everything looks fragile — because it is. The seedling stage, days 0 through 14, is where most first-time growers lose plants they had no reason to lose. Not from bad genetics. Not from bad luck. From overwatering, wrong light, or impatience with nutrients.
This guide covers the complete post-germination protocol from the first 48 hours through the end of week two, when your seedling should be ready to transition into vegetative growth. Whether you're growing photoperiod or autoflower genetics, indoors in a Toronto apartment or a Calgary basement, the same core principles apply — with the nuances you actually need.
What Do Cannabis Seedlings Need in the First 48 Hours?
In the first 48 hours after germination, cannabis seedlings need a pre-moistened growing medium, low-intensity light, stable warmth between 22–26°C, and nothing else. The taproot is anchoring itself and the cotyledons are beginning photosynthesis. This is a hands-off window — resist the urge to water, feed, or adjust.
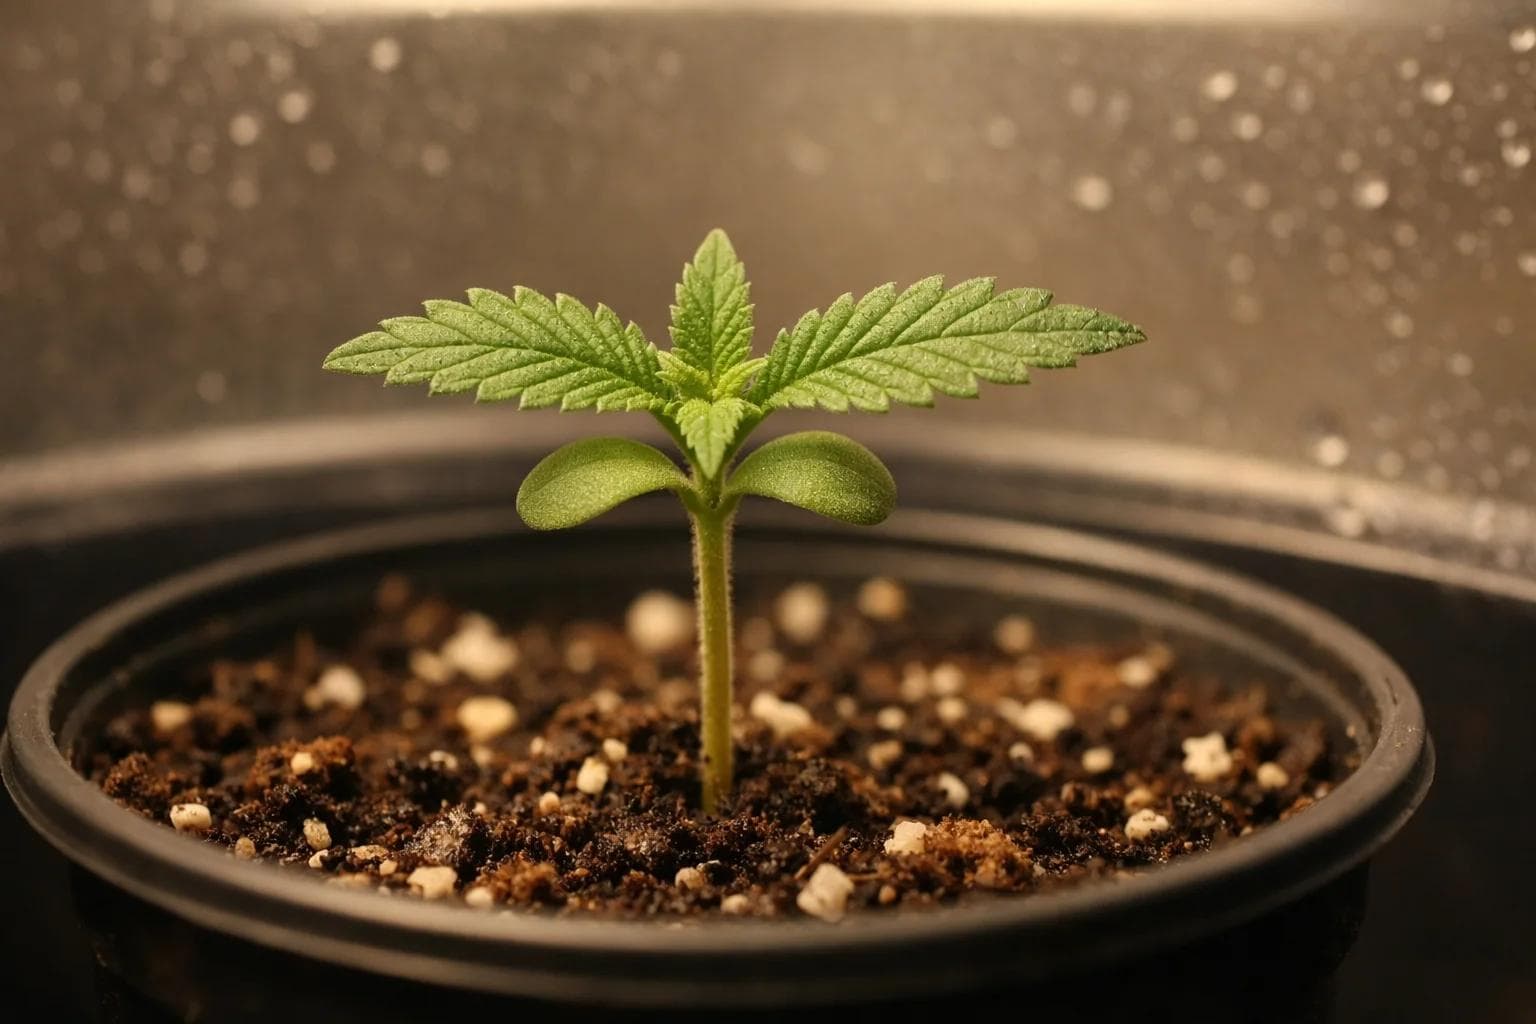
The immediate post-germination window is where over-intervention kills more seedlings than neglect does. Your seedling just cracked open. Its cotyledons — the two small oval seed leaves — are unfolding and beginning their first photosynthesis cycles. Those starter leaves are running on stored reserves from the seed: sugars, amino acids, minerals — enough to sustain the plant for several days without anything from you.
If you used the paper towel germination method or planted directly into soil, your medium should already be pre-moistened. That moisture is sufficient. Do not add more.
First-48h checklist:
- Place the seedling under gentle CFL or LED at 18–20 hours light / 4–6 hours dark
- Maintain grow room temperature at 22–26°C — no dramatic swings
- Do not add water if the medium was pre-moistened at planting
- Cover with a humidity dome to hold 65–70% RH without misting the plant
- Do not add nutrients of any kind
- Do not transplant, probe the medium, or disturb root development
What Is the Best Light for Cannabis Seedlings?
Cannabis seedlings thrive under low-intensity full-spectrum light at 18–20 hours per day. A T5 fluorescent, CFL bulb, or quality LED dimmed to 25–35% power at 40–60 cm above the canopy delivers the right PPFD range (200–400 µmol/m²/s) without heat stress. Target a Daily Light Integral of 15–20 mol/m²/day.
Getting light wrong at this stage is one of the fastest ways to ruin a seedling you worked hard to germinate. Too little and you get stretch — tall, spindly plants that can barely support their own weight. Too much heat from a heavy fixture and you'll stress or burn the canopy before it ever finds its rhythm. Neither direction is subtle once it starts.
Light type comparison:
Light schedule: 18/6 (18 hours on, 6 off) is the standard for photoperiod strains from seedling through vegetative growth. Autoflowers run equally well on 18/6 or 20/4 — the extra light hours help their compressed timeline without causing harm.
Diagnosing stretch early: If your seedling is growing tall and thin with elongated internodes instead of compact and stocky, it's reaching for the light. Move the fixture 5–10 cm closer. If you're already at the minimum safe distance for your light, the fixture is underpowered for your grow space. Leggy & Stretching Cannabis Seedlings — Causes & Fixes
How Often Should You Water Cannabis Seedlings?
Water cannabis seedlings every 2–3 days in small targeted amounts, using a watering ring technique around — not directly on — the stem. The goal is to encourage roots to chase moisture outward. Overwatering kills more seedlings than underwatering. Use the lift test on small containers: a dry pot feels noticeably lighter.
Vague watering advice — "water when the top inch is dry" — fails beginners because it doesn't account for container size, medium density, or root development stage. Here's the specific protocol that works.
The watering ring technique:
- Use a syringe, squeeze bottle, or small watering can with a narrow spout
- Water in a 5–8 cm ring around the stem — not directly onto it
- Pour 30–60 mL per watering for seedlings in solo cups or 4" pots
- Water pH: 6.0–7.0 for soil; 5.5–6.5 for coco or peat-based mixes
- Wait 2–3 days before the next watering cycle
Why overwatering is the primary killer: Waterlogged roots can't absorb oxygen. Starve the roots of oxygen long enough and you've set up the conditions for damping off — a fungal collapse at the soil line that kills seedlings from the base up. In Vancouver or Montreal, where ambient humidity is already elevated and tent condensation is common, an overwatered seedling in a poorly ventilated grow tent can show damping off symptoms within 48 hours.
Signs of overwatering:
- Drooping leaves that look swollen and heavy (not thin and papery)
- Yellowing lower leaves
- Surface mold or algae on the medium
- Stalled or zero visible growth
- Drooping leaves that look thin and wilted
- Dry, cracking soil surface
- Pot feels very light when lifted
What Temperature and Humidity Do Cannabis Seedlings Need?
Cannabis seedlings perform best at 22–26°C (72–79°F) with relative humidity between 65–70%. These conditions minimize transpiration stress on leaves that haven't yet developed full stomatal control. Drop below 18°C or above 30°C and growth stalls or stops. Humidity below 50% causes rapid moisture loss through underdeveloped leaf tissue.
Environmental control at the seedling stage is not about perfection — it's about avoiding the extremes that cost you growth days.
Environmental targets by stage:
Humidity management: A humidity dome solves most RH challenges in the first 7–10 days. Once the seedling outgrows the dome, reduce RH gradually — 5% per day toward 60% — to harden the plant before vegetative conditions. Sharp drops in humidity cause stress; go slow.
US climate note: In Phoenix or Los Angeles grow rooms with forced-air heating, ambient RH can drop below 30% in winter. A small ultrasonic humidifier placed inside or near the tent keeps RH in range without requiring a dome for the full first two weeks.
When Should You Start Feeding Nutrients to Cannabis Seedlings?
Do not add any nutrients for the first 10–14 days after germination. The cotyledons contain stored energy from the seed — sugars, amino acids, and minerals — that sustain the seedling without external feeding. Adding nutrients before the cotyledons yellow signals the roots to absorb salts they cannot yet process, causing tip burn.
The most common nutrient mistake beginners make is starting too early. It comes from a good instinct — you want the plant to grow — but seedling roots are extremely salt-sensitive at this stage, and there's no nutritional deficit to fix yet.
The cotyledon biology: A cannabis seed stores energy in its endosperm — a nutrient reserve that activates during germination. The cotyledons then begin photosynthesis within 24–48 hours of emergence, bridging the plant from stored reserves to light-driven sugar production. Until the first true leaves develop and the root system begins drawing from the medium, any fertilizer you add just sits in the root zone as excess salt — and seedling roots can't handle that.
Feeding timeline:
Signs of premature nutrient burn: Yellowing or browning tips on the first true leaves (not the cotyledons), claw-shaped leaf edges indicating nitrogen toxicity, or bleached pale new growth. If you see these in week 1 and you added nutrients, flush with pH-corrected water immediately and stop feeding.
First feed formulation: When the time comes, use a seedling-specific formula or a heavily diluted (¼ strength) base vegetative nutrient — pH 6.0–6.5 for soil. Leave out the cal-mag, bloom boosters, enzymes, and beneficial bacteria for now. The seedling doesn't need them yet.
What Does a Healthy Cannabis Seedling Look Like Week by Week?
A healthy cannabis seedling passes through three clear visual phases: taproot emergence and cotyledon opening (days 0–3), first true leaves and upright growth (days 4–7), and multi-node development with tightening internodes (days 8–14). Deviations from this progression signal environmental or care problems, not genetic failure.
Having a clear visual reference for each stage is the difference between catching a problem early and losing a plant at day 10 because you didn't know what "normal" looked like.
Week-by-week milestone table:
- Stem is short and stocky — not tall and stretched
- Cotyledons are deep green, symmetric, and horizontal
- True leaves are symmetrical with no twisting, claw, or discolouration
- Internode spacing is tight (1–2 cm between nodes)
- Plant stands upright without support
When your plant reaches the end of week two with 3–4 healthy nodes, tight internodes, and roots beginning to appear at the drainage holes, it's ready for transplant or confirmed vegetative growth. Transplanting Cannabis Seedlings — When & How
For a deeper diagnostic breakdown of days 1–14, see Cannabis Seedling Stage — The Critical First 14 Days.
Is Autoflower Seedling Care Different From Photoperiod?
Autoflower seedlings follow the same environmental targets as photoperiod strains but require gentler handling and — critically — no transplanting. Because autoflowers run on a fixed internal clock regardless of light schedule, any stress during the seedling stage permanently compresses the vegetative window and reduces final yield.
Key differences for autoflower seedlings:
For autoflower-specific germination setup, see Germinating Autoflower Seeds — Tips & Differences vs Photoperiod.
FAQ
Why are my cannabis seedlings stretching toward the light?
Seedling stretch — technically called etiolation — happens when light intensity is too low or the fixture is too far from the canopy. Move your CFL or LED 5–10 cm closer. If you're already at minimum safe distance, the light is underpowered for your space. Compact internodes are the goal. [LINK: Leggy & Stretching Cannabis Seedlings — Causes & Fixes | /en/articles/leggy-stretching-cannabis-seedlings]
Can I put seedlings under a 600W HPS?
No. HPS lamps generate too much heat and light intensity for seedlings. Start with CFL, T5, or a dimmed LED. Introduce seedlings to HPS only after 3–4 nodes are established and the plant has been gradually acclimated over several days.
Do I need a humidity dome for cannabis seedlings?
A humidity dome is strongly recommended for the first 7–10 days, particularly if your grow room runs below 60% RH. It holds the 65–70% target without misting the plant directly. Begin removing it for short periods at day 10 to harden the seedling before transitioning to open-air vegetative conditions. [LINK: Using a Humidity Dome for Cannabis Seedlings | /en/articles/humidity-dome-cannabis-seedlings]
When are cannabis seedlings ready to move to a bigger pot?
Seedlings are transplant-ready when roots begin circling the bottom of the container (visible through drainage holes) or when the plant has 3–4 nodes and the canopy width approaches the container diameter. This typically occurs between days 14–21. [LINK: Transplanting Cannabis Seedlings — When & How | /en/articles/transplanting-cannabis-seedlings]
What water pH should I use for cannabis seedlings?
Target 6.0–6.5 for soil, 5.5–6.0 for coco or peat mixes. Canadian tap water pH varies significantly by region — water in Montreal and Quebec City typically runs 7.5–8.0 and requires pH correction before use. [LINK: Water pH & Quality for Cannabis Seed Germination | /en/articles/water-ph-quality-cannabis-germination]
What should I do if my seedling is falling over?
A seedling falling over is typically either a stretch problem (add a light support stake and move the light closer) or damping off (stem collapse at the soil line caused by overwatering and fungal infection). Check the stem base: if it looks pinched or darkened, damping off is the likely cause. [LINK: Damping Off in Cannabis Seedlings — Causes, Prevention & Treatment | /en/articles/damping-off-cannabis-seedlings] --- [LINK: Shop Premium Cannabis Seeds | /en/shop] — Start with premium genetics and give your seedlings the best possible foundation. ---
19+ | Educational horticulture only.