
Master Your Indoor Grow
Indoor Growing Guides
Cannabis Grow Tent Setup: Complete Indoor Guide for Beginners
Step-by-step indoor cannabis grow tent setup — tent size, LED lights, ventilation, growing medium and beginner checklist for Canadian home growers.
Selecting the right grow tent size is essential for indoor cannabis cultivation success. The 60×60cm tent accommodates 1–2 plants and yields 1–3 oz per harvest, making it ideal for beginners. The 80×80cm size supports 2–4 plants and offers enough space for training techniques like LST. For most Canadian growers, the 120×120cm tent is the sweet spot—it fits 4–6 plants, pairs with a 600–1000W LED system, and delivers the best balance of yield and manageability. Matching your cannabis grow tent setup to your space, ceiling height, and plant count prevents overcrowding and maximizes your harvest potential.
Overview
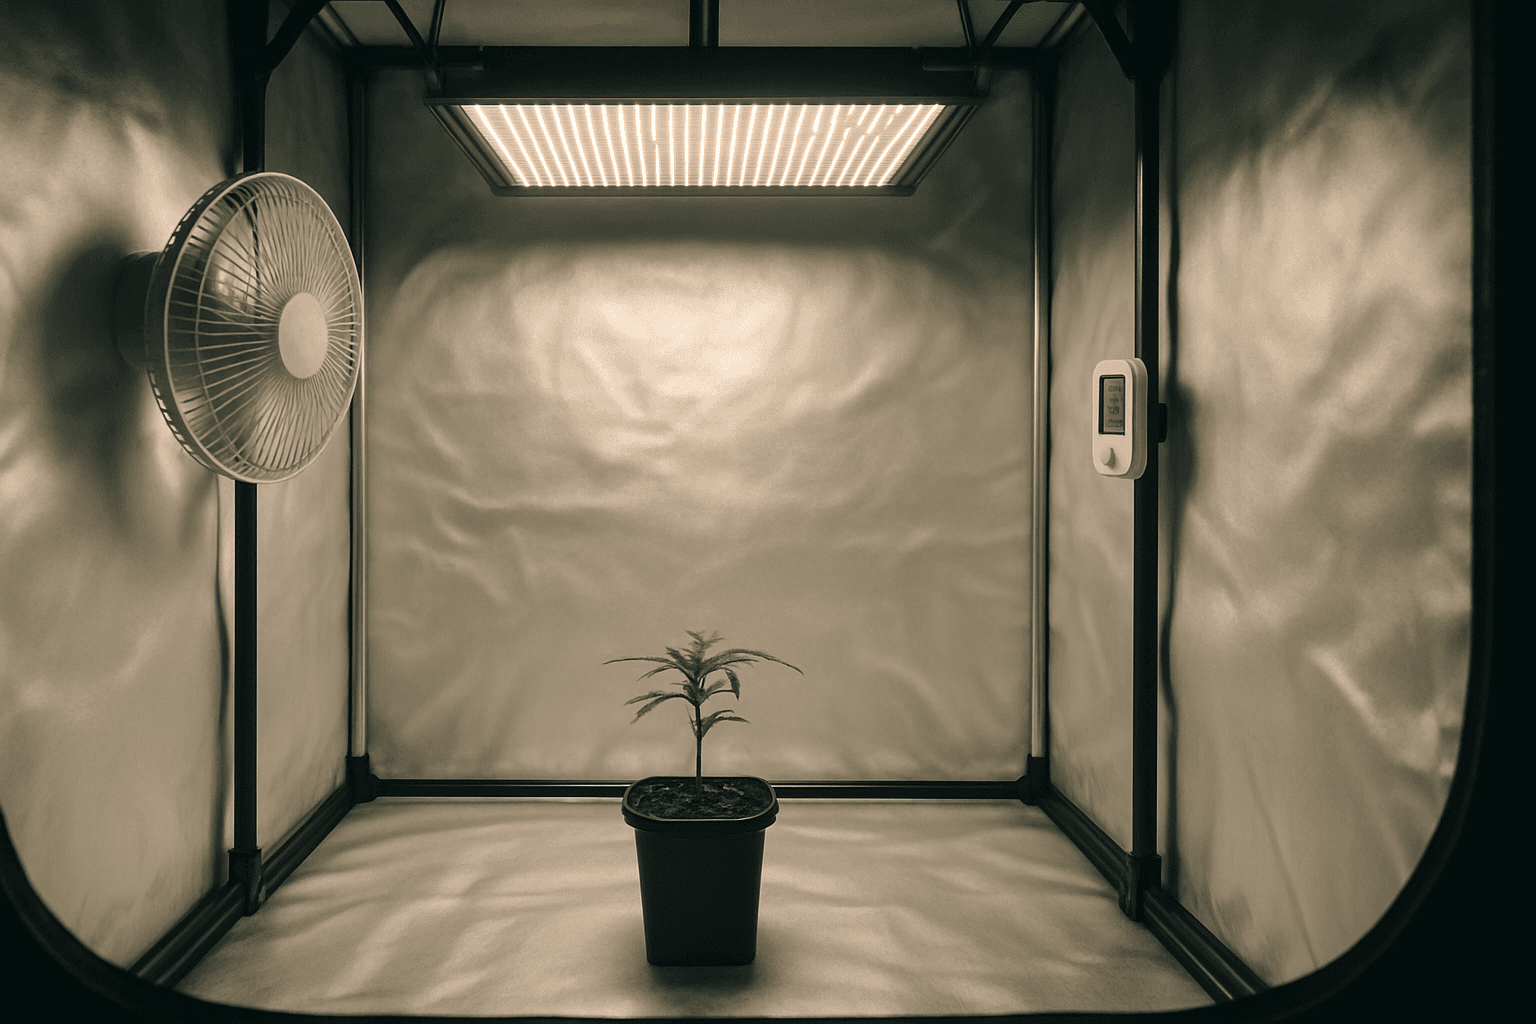
Grow tents have become the definitive starting point for Canadian home cannabis growers — and for good reason. A quality tent gives you a fully contained, light-proof environment that you can dial in precisely, regardless of what's happening outside. No converting a spare room, no light leaks ruining your photoperiod schedule, no cannabis smell drifting through the house. Everything you need — lighting, ventilation, humidity control — integrates cleanly into one manageable space. They're also remarkably affordable relative to what you get: a controlled microclimate that can produce top-shelf results from your very first grow. Whether you're working with a closet corner or a dedicated basement space, a properly equipped grow tent is the smartest, most efficient way to start growing cannabis indoors in Canada.
Summary
A well-assembled grow tent isn't just equipment — it's a controlled environment where genetics can fully express themselves, harvest after harvest. Once your setup is dialled in, the biggest variable left is the quality of your seeds. Premium Prairie Seeds offers a carefully selected catalogue of indoor-optimized cultivars — from compact autoflowers suited to 60cm tents to high-yielding photoperiod strains bred to fill a 120×120cm canopy. Start with genetics you can trust, pair them with the setup outlined in this guide, and your first Canadian home harvest will be anything but average.
Choosing Tent Size
Matching your tent to your plant count and ceiling height is one of the most important decisions you'll make before your first seed goes in the ground.
60×60cm (2×2ft): The compact option, ideal for 1–2 plants. Perfect for beginners wanting to learn the fundamentals without a major investment. Expect 1–3 oz per harvest depending on strain and skill level.
80×80cm (2.5×2.5ft): A popular mid-range size supporting 2–4 plants comfortably. Gives you enough room to experiment with training techniques like LST or topping without feeling cramped.
120×120cm (4×4ft): The most popular tent size among serious home growers. Fits 4–6 plants and pairs perfectly with a 600–1000W LED system. This size offers the best balance of yield potential and manageability for most Canadians growing the legal limit.
Ceiling height is non-negotiable. A minimum of 2 metres clearance is recommended — ideally more. You need vertical space for the plant canopy, pot height, grow medium, plus hanging room for your light and carbon filter above. Measure your space carefully before purchasing. Running out of vertical room mid-flower is a problem with no easy fix.
Growing Medium
Your choice of growing medium shapes everything from watering frequency to nutrient uptake to how forgiving the system is when you make mistakes.
Soil (Best for Beginners): A quality cannabis-specific or peat-based potting mix acts as a natural buffer for pH swings and nutrient imbalances. Organic amended soils like those from companies such as Fox Farm or BUILD-A-SOIL can be virtually water-only systems for much of the grow. Soil rewards patience and is the most forgiving medium available.
Coco Coir (Intermediate): Coconut husk fibre behaves like a hydroponic medium in many ways — it's inert, drains fast, and allows roots to uptake nutrients rapidly. Coco growers typically see faster vegetative growth and heavier yields than soil growers, but you must pH your water to 5.8–6.0 and feed nutrients with every watering.
DWC Hydroponics (Advanced): Deep Water Culture suspends roots directly in oxygenated, nutrient-rich water. Growth rates are exceptional, but pH and nutrient concentration must be monitored daily. Not recommended as a first-grow medium.
Pot Sizing: Use 11–15L (3–5 gallon) pots for photoperiod plants and 7–11L (2–3 gallon) for autoflowers. Undersized pots restrict roots and limit final plant size and yield.
Lighting
Lighting is the single biggest driver of cannabis yield and quality indoors, and today LED grow lights dominate for good reason.
LED (Recommended): Modern quantum board and bar-style LEDs deliver exceptional photon efficiency (µmol/J), run cooler than legacy technologies, and last 50,000+ hours. For a 120×120cm tent, target 500–600W of actual LED draw — not the inflated 'equivalent' wattage you'll see on some packaging. A reliable benchmark is roughly 200–250 actual watts per square metre of canopy for dense, high-quality flower. Top Canadian-friendly brands include Mars Hydro, Spider Farmer, and HLG.
HPS (High-Pressure Sodium): Still respected for its proven flowering spectrum and penetration depth. Runs significantly hotter and requires more ventilation management, but many experienced growers swear by the results.
CMH/LEC (Ceramic Metal Halide): An underrated middle ground — excellent full-spectrum light, better efficiency than HPS, and a more natural spectrum that many growers feel improves terpene profiles.
Light Cycles: Photoperiod strains require 18 hours light / 6 hours dark during vegetative growth, switching to 12/12 to trigger flowering. Autoflowering strains typically run on 18/6 or 20/4 from seed to harvest, simplifying the process considerably for beginners.
Setup Checklist
Follow this sequence before your first seedling breaks the surface:
- Assemble the tent on a level surface with all poles and connectors secure.
- Hang the carbon filter inside the tent near the top, connected to ducting.
- Mount the inline exhaust fan outside the tent or in the upper corner, ducted to the filter.
- Install the grow light using adjustable rope ratchets — leave room to raise it as plants grow.
- Set up the circulation fan clipped to an interior pole at canopy level.
- Run all power cables through designated tent ports — never crimp ducting or cables in closures.
- Place a digital thermometer/hygrometer at canopy height inside the tent.
- Fill and prepare pots with your chosen growing medium.
- pH-test your water source and adjust to the correct range for your medium.
- Power on the exhaust fan and verify negative pressure (tent walls pull slightly inward).
- Dial in your light schedule using a timer — confirm it cycles correctly over 24 hours.
- Germinate your seeds and introduce seedlings once the environment is stable.
Ventilation
Proper airflow is what separates a healthy, high-yielding tent from one plagued by mould, heat stress, and pungent odour complaints from neighbours.
Exhaust Fan + Carbon Filter: This is your most critical pairing. An inline exhaust fan pulls hot, humid, odour-laden air out of the tent and pushes it through a activated carbon filter before it exits your grow space. In Canada, where apartment grows and shared walls are common, odour control isn't optional — a quality carbon filter running from mid-flower onwards is essential. Match your fan's CFM (cubic feet per minute) rating to your tent volume, with capacity to spare.
Passive or Active Intake: Smaller tents can rely on passive intake — negative pressure pulls fresh air through mesh vents at the base. Larger tents (120cm+) benefit from a small active intake fan to ensure consistent fresh air exchange.
Circulation Fan: A clip-on or standing oscillating fan inside the tent strengthens stems, prevents hot spots, and keeps surface moisture from settling on leaves — a key factor in mould prevention.
VPD (Vapour Pressure Deficit): Understanding the relationship between temperature and relative humidity will elevate every grow. Aim for temps of 24–28°C and RH of 60–70% in veg, dropping to 40–50% RH in late flower to prevent bud rot. A basic digital thermometer/hygrometer is a must-have tool.
FAQ
How do I choose the right grow tent size for a beginner?
Start with either a 60×60cm (2×2ft) for a single plant or an 80×80cm (2.5×2.5ft) for 2–4 plants. The 60×60 is ideal if you want to master the fundamentals with minimal investment, while the 80×80 gives you more room to experiment with training techniques like LST. Both sizes make environmental controls easier to manage as a beginner since temperature and humidity adjustments take effect quickly in a smaller space.
What lighting and ventilation do I need for a grow tent?
An 80×80 tent typically pairs well with a 200–400W LED panel and a 4-inch inline fan. For a larger 120×120cm setup, you'll want a 600–1000W LED system with more robust ventilation to manage heat and CO₂ exchange. The specific wattage depends on your plants and tent size, but investing in quality LED and a proper inline fan prevents most environmental problems beginners face.
Can I use my grow tent for both seedlings and flowering at the same time?
Yes, many growers use multiple tents in a perpetual harvest setup—a smaller tent can run a continuous seedling or clone cycle while a larger tent handles flowering plants. This approach maximizes your growing schedule, though it requires managing two separate environments with independent controls. Start with a single tent and grow cycle before attempting this strategy.
Why is matching tent size to my space so important?
Matching your tent to your plant count and ceiling height determines how well you can control lighting, ventilation, and environmental conditions downstream. A properly sized tent makes environmental feedback loops easier to understand and adjust, which is critical for beginners learning to dial in their setup. Getting this wrong means fighting your own environment for the entire grow instead of working with it.
What's a realistic yield expectation from a grow tent?
A 60×60 tent typically produces 1–3 oz per harvest, an 80×80 produces more with proper training, and a well-managed 120×120 can yield 400–600g+ per cycle in experienced hands. Your actual yield depends heavily on LED quality, environmental control, plant training, and your skill level. Starting with modest expectations for your first grow helps you focus on learning rather than chasing maximum production.
19+ | Educational horticulture only.