
Master Your Indoor Grow
Indoor Growing Guides
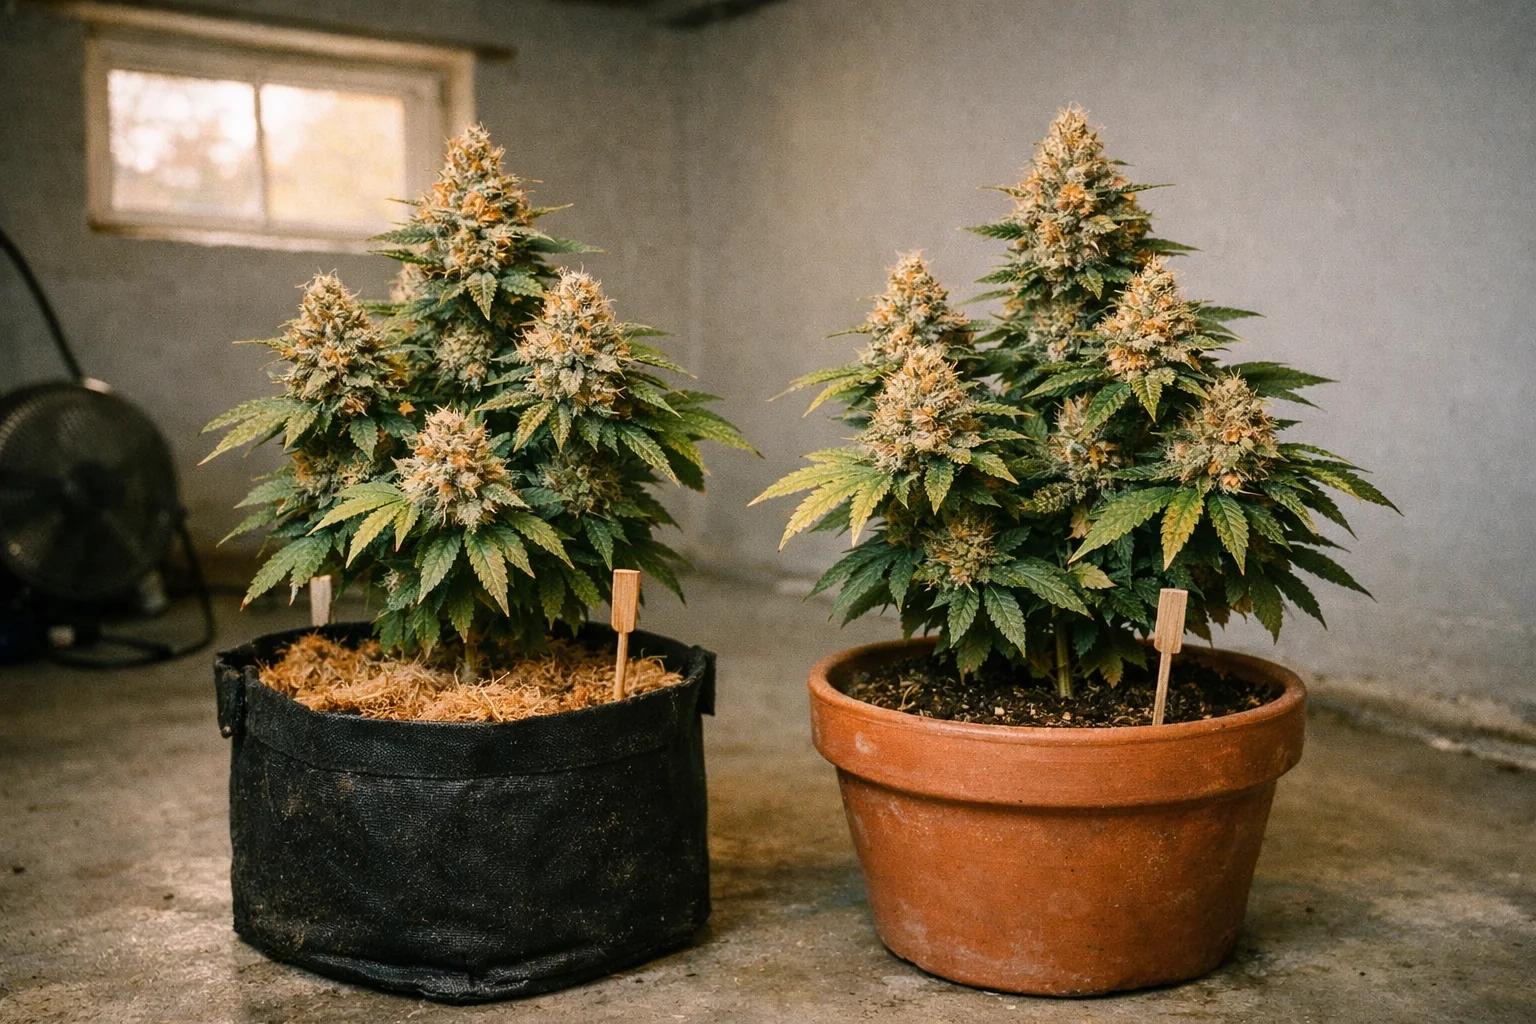
Coco Coir vs Soil for Cannabis: Which Should Canadian Growers Choose?
Coco coir vs soil for cannabis in Canada: watering, nutrients, cost, yield, flavour — complete head-to-head for indoor growers. Pick the right medium for your setup.
Coco coir is an inert, hydroponic-like substrate that demands daily feeding but pushes faster vegetative growth, while soil holds water and nutrients for 3–5 days and forgives mistakes. For Canadian home growers, coco wins on yield and speed; soil wins on simplicity and flavour. Pick coco for output, soil for craft.
Coco coir is an inert, hydroponic-like substrate that demands daily feeding but pushes faster vegetative growth, while soil holds water and nutrients for 3–5 days and forgives mistakes. For Canadian home growers, coco wins on yield and speed; soil wins on simplicity and flavour. Pick coco for output, soil for craft.
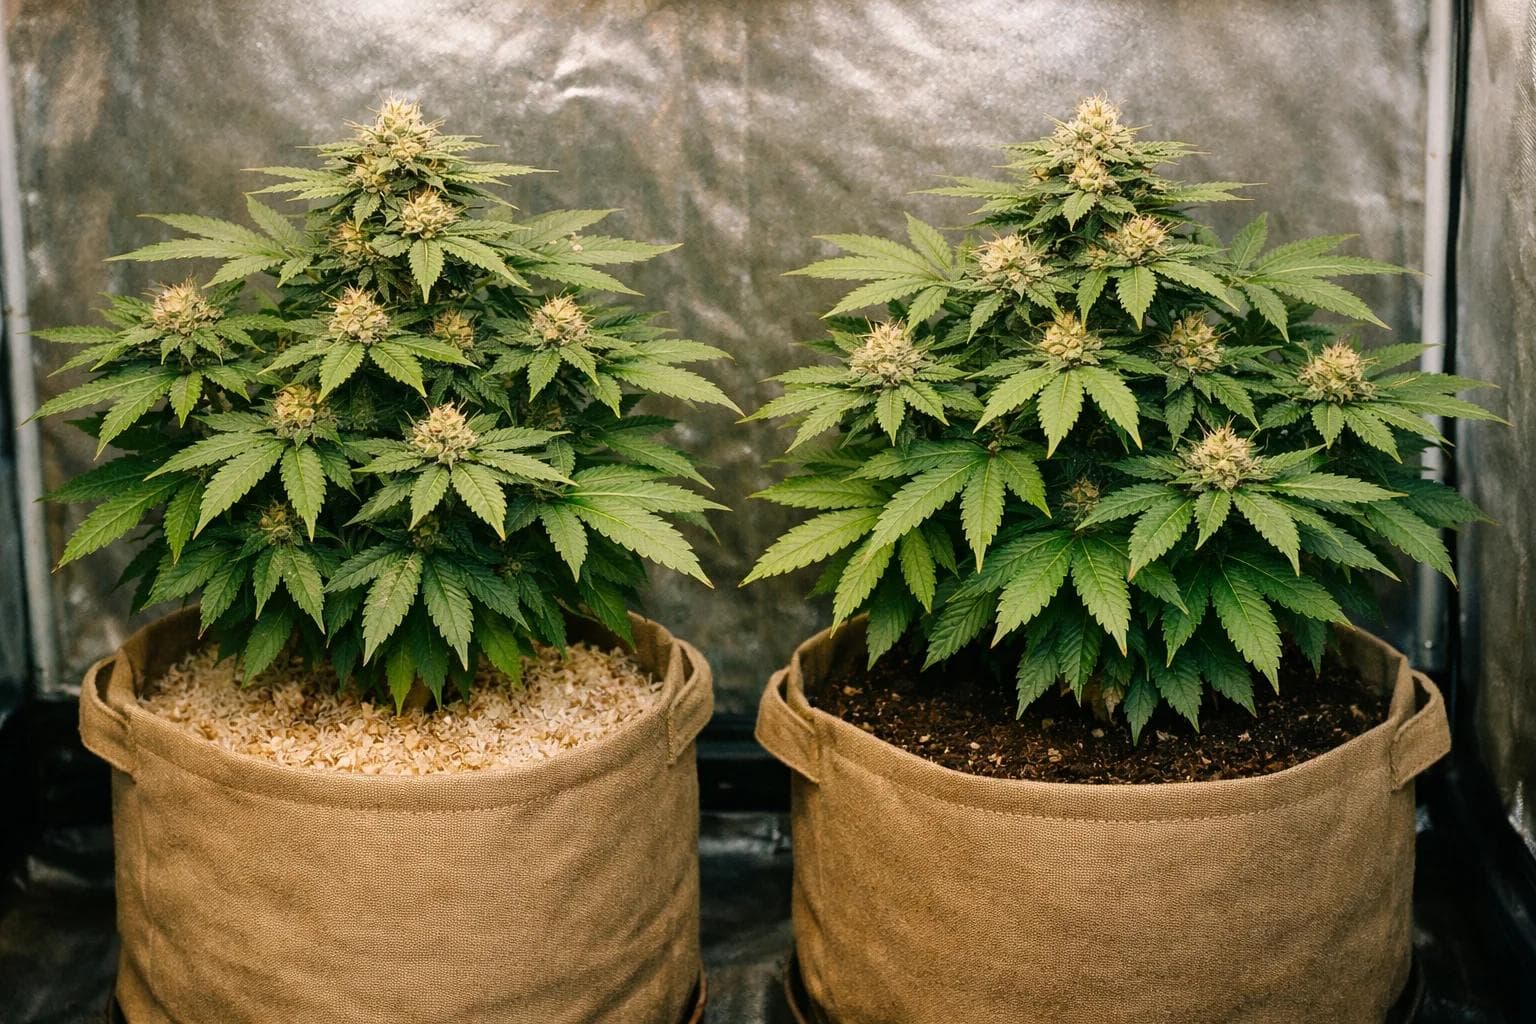
You're at a Canadian Tire or a hydro shop, looking at a 50 L bag of ProMix HP next to a 5 kg coco brick, trying to decide which one belongs under your seedlings this weekend. Both work. Both can deliver a full-weight harvest. Both fail spectacularly when run wrong. What separates them isn't quality — it's pace. Coco runs on a daily-feeding heartbeat. Soil breathes on a 3-to-5-day cycle. Pick the rhythm that matches your life and the medium becomes a tool rather than a problem.
This guide is for Canadian home growers — basement tents in Sherbrooke, sealed rooms in Vancouver, balcony pots in Toronto. We compare watering, feeding, costs in CAD, yield, flavour, and the specific mistakes that ruin a first coco run. By the end you'll know which medium fits your setup and why pros at scale default to coco while seasoned hobbyists swear by soil.
What's the actual difference between coco coir and soil for cannabis?
Coco coir is the fibrous husk of coconuts, washed and buffered to remove salts, sold as compressed bricks or pre-hydrated bags. It contains almost zero nutrients — what you feed is what the plant gets. Cannabis treats coco as a hydroponic medium with physical support: roots breathe easily, drainage is excellent, feed-water passes through in seconds. The grower controls every variable.
Soil for cannabis usually means a peat-based potting mix amended with perlite, worm castings, bat guano, kelp meal, and mycorrhizal fungi. ProMix HP, FoxFarm Ocean Forest, and similar Canadian blends carry 2–4 weeks of starter nutrition. The soil acts as a buffer — pH swings smooth out, salt accumulates slowly, and the plant pulls from a living microbial ecosystem rather than a direct nutrient solution.
Structure matters most. Coco holds about 40% air after drainage; soil holds 15–25%. That extra oxygen at the root zone is why coco-grown cannabis vegs faster and stacks more flower sites . The cost is daily watering — coco dries out fast, soil holds moisture for 3–5 days.
pH targets diverge by 0.4 points. Coco runs 5.8–6.2; soil runs 6.2–6.8. Peak-flower EC differs more — coco feeds at 1.8–2.2 EC because every watering is a feeding, while soil runs 1.2–1.6 EC and lets the ecosystem mineralize the rest. Confuse the two and you lock out nutrients within a week.
Cation exchange capacity tells the rest of the story. Soil CEC is 15–30 meq/100g; coco CEC is 40–100 meq/100g. Coco actually holds more nutrients than soil — but it preferentially binds calcium and magnesium, which is why coco growers always supplement Cal-Mag at 75–100 ppm per feeding. Skip it and you get rust spots on mid-canopy leaves within ten days .
There's a third option — peat-based "soilless" mixes like ProMix HP that sit between the two. Behaviour is closer to coco (low nutrient content, needs regular feeding), but the pH buffer is closer to soil (6.0–6.5). Treat ProMix-style soilless as coco for feeding, soil for watering rhythm.
Feminized Seeds
Gorilla Glue #4 Feminized
How does coco coir's watering schedule differ from soil?
The biggest lifestyle difference is watering frequency. A 4 L coco pot in late veg drinks roughly 1.5 L per day — sometimes double under aggressive LED. A 4 L soil pot at the same stage holds 3–5 days of water. If you travel for work, if you can't tend the tent daily, soil wins on logistics alone.
Coco's water-holding capacity drops as the plant grows. A seedling in 1 L drinks 100 ml every other day. By week 4 of veg in 3 L, the same plant takes 500 ml daily. By week 6 of flower in a 5 L pot under a 600 W LED, you're feeding 2 L every 24 hours — twice on heat-spike days. Miss a day in flower and the medium goes bone dry: leaves crisp at the tips, roots stress, the plant loses 5–10% of its yield in 48 hours.
Soil is more forgiving by a wide margin. A 3 L soil pot in veg holds moisture for 2–3 days; a 7 L flowering pot holds 4–6. The risk is the opposite: overwatering. New growers panic at slightly dry topsoil and dump another half-litre in. Roots drown, oxygen depletes, and within a week you see the limp downward droop that signals root rot. One rule: lift the pot. If it feels heavy, wait another day.
Both mediums benefit from runoff. In coco, target 15–20% runoff at every feeding to flush salt. In soil, run runoff every 4th or 5th watering — enough to clear salts without leaching the microbial ecosystem. Coco runoff EC should sit within 0.2 of input; if it climbs above 2.5 in flower, flush with pH'd water and resume at a lower feed strength.
Water temperature matters more in coco because coco transfers temperature to roots fast. Aim for 18–22°C before feeding. Cold tap water in Canadian winters (10–14°C straight from a Toronto or Calgary pipe) shocks coco roots in seconds, slowing nutrient uptake for hours. Let water sit an hour, or run a small aquarium heater in your reservoir.
The watering decision comes down to one question: can you reliably water every day, weekends included, including the Friday you're going to a wedding in Mont-Tremblant? If yes, coco unlocks faster growth. If no, soil saves the grow.
For the underlying PPS pH guide that covers both mediums, the meter-and-drop method applies to both — only the target pH changes.
Which medium gives faster vegetative growth?
Coco wins on raw veg speed by 20–35% over soil in most home setups. A coco plant pushes a new internode every 4–5 days in optimal conditions; a soil plant pushes the same internode in 6–7. Over a 4-week veg, that compounds into a coco plant that's noticeably larger, with more lateral branches and more bud sites primed for flowering .
The mechanism is oxygen at the root zone. Coco's 40% air porosity means roots respire faster, which drives faster nutrient uptake, which drives faster cell division above ground. The plant isn't working harder — it isn't fighting the medium for oxygen.
Faster veg has two practical consequences. First, you can run a shorter veg in coco — 3 weeks instead of 4–5 in soil — and hit the same canopy size, shaving 1–2 weeks off your total cycle. Second, coco plants stack more node density during veg, which means more flower sites at the flip. Total bud count per plant runs 15–25% higher in coco than soil in most controlled comparisons.
Soil's slower veg builds a more diverse root system because roots branch heavily into a non-uniform medium hunting for nutrients. Coco roots stay uniform because the feed is uniform. In late flower, soil's root diversity provides a small buffer against lockout, which can give a soil plant a smoother finish even if peak vegetative speed was lower.
Training works in both but timing shifts. Topping in coco at day 18 of veg is comparable to topping in soil at day 25. LST windows are the same. ScrOG fills a screen 5–7 days earlier in coco under identical conditions. The training techniques guide covers the mechanics for both setups.
For a Canadian indoor grower running perpetual harvests in a 4x4 tent, the math is real: four cycles per year on soil typically becomes five on coco. That's a 25% productivity gain on the same hardware — meaningful if you're running for personal supply at the legal 4-plant limit per household.
The trade-off: coco's speed makes it less forgiving. A nutrient mistake shows up in 48 hours; in soil you have 5–7 days to catch and correct. Beginners often start in soil for the margin, then switch to coco after two or three cycles when their workflow is dialed in.
How do nutrients work differently in coco vs soil?

Coco demands a synthetic, mineral-based nutrient regimen because the medium contributes nothing. Every nitrogen, phosphorus, potassium, calcium, magnesium, and micronutrient atom comes from what you mix in. The grower controls the entire nutritional environment — precise control over growth and flowering, zero margin for error.
Soil contributes 2–4 weeks of starter nutrition through compost, worm castings, and amendments. From week 4 of veg you start supplementing, but the soil ecosystem keeps mineralizing organic matter on its own schedule. Organic soil growers feed less frequently and let the microbes work. Trade-off: less precise flowering peaks, smoother overall nutrient curve.
EC targets diverge significantly. In coco:
- Seedling: 0.4–0.6 EC
- Early veg: 0.8–1.0 EC
- Late veg: 1.4–1.6 EC
- Early flower: 1.6–1.8 EC
- Peak flower (weeks 4–6): 1.8–2.2 EC
- Final flush (weeks 7–8): 0.4 EC or plain pH'd water
- Seedling: water only for 2–3 weeks
- Early veg: 0.6–0.8 EC
- Late veg: 1.0–1.2 EC
- Early flower: 1.2–1.4 EC
- Peak flower: 1.4–1.6 EC
- Final flush: water only
Cal-Mag is mandatory in coco, optional in soil. Coco binds calcium and magnesium at cation sites and slowly releases sodium and potassium in their place. Without 75–100 ppm Cal-Mag at every feed you get rust spots on mid-canopy leaves around day 21 of veg, progressing upward if uncorrected. Soil contains enough calcium from dolomite lime and amendments that supplementation is rarely needed unless you're using ultra-pure RO water.
pH stability is where soil shines. A balanced organic soil holds 6.4–6.6 for weeks before drifting. Coco pH drifts within 3–5 days of consistent feeding — drop into 5.3 and iron uptake collapses; climb above 6.5 and phosphorus locks out. Daily pH checks are non-negotiable in coco; weekly checks suffice in soil. The PPS nutrients guide covers the EC ramp for both mediums.
Organic soil is the only practical path to a no-chemical grow. "Living soil" cultivation uses compost teas, fish hydrolysate, alfalfa meal, and beneficial microbes. Coco can be run with organic-derived liquids (General Organics, Roots Organics), but microbial life doesn't establish the same way because the medium is inert. If you value organic principles for flavour or sustainability, soil is the honest answer.
Feminized Seeds
OG Kush Feminized
What's the upfront and ongoing cost difference per harvest?
Upfront, coco is cheaper. A 5 kg compressed coco brick from a Canadian hydro shop runs $15–22 CAD and rehydrates to roughly 70 L — enough for 14 plants in 5 L fabric pots. The same 70 L of quality soil mix (ProMix HP or FoxFarm Ocean Forest) costs $80–110 CAD. Per plant: coco at $1.50 per pot fill vs $6–8 for premium soil.
The cost flip happens on nutrients. A 4-part coco-specific line (Canna Coco A+B, Cal-Mag, PK booster) for a 4-plant cycle costs $90–130 CAD. Soil with quality organic amendments (worm castings refreshed mid-cycle, kelp meal, occasional dry organic top-dress) runs $40–60 CAD per cycle. Over a year of perpetual harvest (5 cycles), coco nutrients run $500–700 CAD; soil nutrients run $200–300 CAD.
Total cost per cycle, 4-plant indoor grow:
- Coco: $30 medium + $100 nutrients + $20 Cal-Mag + $10 pH-up/down = $160 CAD per cycle
- Soil: $80 medium + $50 nutrients/amendments + $5 pH adjusters = $135 CAD per cycle
Water cost is real but minor. A 4-plant coco flower tent uses 8–12 L per day. Over a 60-day flower cycle that's 480–720 L. At Toronto municipal rates ($3.50 per cubic meter), it's $2–3 CAD per cycle. Soil uses 25–40% less water — the cost difference is under $1.
Equipment costs are similar with coco-specific extras. A pH meter is mandatory for coco ($30–80 CAD), strongly recommended for soil. A TDS/EC meter is mandatory for coco ($25–60 CAD), optional for soil. A small aquarium pump or air stone in your reservoir helps coco growers ($15–30 CAD). Drip irrigation kits, useful for automated coco feeding, run $80–150 CAD for a 4-plant setup.
The hidden cost in soil is replacement frequency. Most growers don't re-amend and reuse soil after one cycle because salt buildup, root biomass, and depleted nutrition make it less productive than fresh soil. Living soil growers who actively re-amend can run the same soil for 5+ cycles, dropping medium cost to near zero, but this needs composting infrastructure most basement growers won't maintain. Coco can be reused for one additional cycle if rinsed and re-buffered between runs, after which the structure degrades.
Feminized Seeds
Bruce Banner Feminized
Which is more forgiving for beginners?
Soil. A first-cycle grower who waters every 3 days, feeds half-strength once a week, and keeps the pot in a 4 L fabric under decent light will harvest something — maybe not optimal, but smokable flower. The same first-cycle grower on coco who forgets a feeding day, mixes the wrong EC, or skips Cal-Mag will see deficiency inside ten days and a stunted plant by week 3.
Soil's forgiveness comes from three buffers: pH stability, slow nutrient release, and water retention. A first-time grower will mess up at least one — overfeed, under-pH, overwater. Soil absorbs the mistake. Coco amplifies it.
The most common first-coco failures are predictable. Skipping Cal-Mag because the nutrient bottle didn't mention it (it rarely does — you have to buy a separate bottle). Watering with 8.0 pH tap water unadjusted. Letting the medium dry to bone-dry on a hot weekend because nobody warned the grower that flowering coco drinks more on day 3 than on day 1. Overwatering at the seedling stage out of nervous concern. Mixing 600 PPM nutrient solution in week 2 of veg because "more is better."
Soil failures take longer to manifest. Overwatering causes leaf droop in 3–4 days. pH drift takes 2–3 weeks to show. Nutrient excess shows up as tip burn over 7–10 days. Each gives the grower time to read a forum post, ask a friend, or check a guide before damage compounds.
For an absolute beginner, the path is: cycle one in soil to learn the basic rhythm — when to water, how leaves communicate stress, what trichomes look like at harvest, how to dry and cure. Cycle two in coco if the rhythm is solid, to gain control and yield. Cycle three onward, whichever medium fits your lifestyle.
Beginners running coco should mitigate the learning curve with structural choices. Use larger pots than recommended (5 L instead of 3 L) so the medium dries slower. Pre-mix nutrients in a 20 L reservoir for the week so you're not doing chemistry while exhausted. Buy a cheap pH pen (Hanna Checker, $35 CAD) and check every feed. Read the VPD and environment guide because environmental mistakes compound coco's other risks.
For the seedling stage specifically, soil is far easier. Seedlings hate over-feeding and over-watering, and soil's starter nutrition means you feed nothing for 2 weeks while they establish. In coco you have to feed at 0.4 EC from day 4 or the seedling starves — and the line between feeding and overfeeding is razor-thin. Many coco growers still start seedlings in soil or Rapid Rooters before transplanting.
Can you switch between coco and soil mid-grow?
You can transplant from one medium to the other but the plant will sulk for 5–10 days while roots adapt to the new chemistry. The most common transition is starting seedlings in soil or peat plugs, then transplanting into coco at week 2–3 of veg. This works because the seedling's root mass is small and the new medium dominates quickly.
Going the other direction — flowering plant in coco, transplant to soil — is rarely useful and almost always harmful. Coco-adapted roots are used to high oxygen, frequent feeding, and tight pH control. Drop them into denser soil and they suffocate, flowering stalls 7–14 days, and you lose 15–30% of yield. Don't do this without a specific reason.
The realistic switch is between cycles, not mid-cycle. A grower who runs cycle one in soil and decides cycle two will be coco simply harvests, dries, cures, and starts fresh seedlings in coco. The setup and learning curve transfer; the plant doesn't have to.
There's a hybrid worth mentioning: super-soil pots topped with a few centimeters of coco for the seedling start. Seedling roots into coco first, deep roots eventually find the amended soil layer, and the grower gets coco's veg speed with soil's late-flower buffer. Advanced technique, mixed results — when it works it works well; when the layers don't blend, the plant has identity problems.
Mixed-medium pots — coco-perlite-soil blends in the same container — are common in Europe but less common in Canada. A 50/50 coco-soil mix holds water 2–3 days, drains well, pH-buffers somewhat, and accepts a moderate feeding regimen (1.2–1.6 EC). It's the "splitting the difference" answer for growers who can't commit fully to either rhythm.
If you're switching mediums for cycle two, plan the transition during the dry-and-cure window of cycle one. Get the new substrate in advance, mix it ahead of time so coco is fully expanded or soil has rested for a week, and have your new feeding regimen mapped before seedlings hit the medium. The transition is mental more than physical — the grower has to retrain their watering instincts.
For comparing soil amendments specifically, the PPS soil guide breaks down what to look for in a Canadian-available bag and how to amend a base soil for cannabis-specific performance.
Which medium gives better flavour at harvest?
Soil produces more complex, terroir-driven flavour profiles. A well-cured soil-grown flower from a strain like OG Kush or Sour Diesel carries the earthy undertones, the slight savoury note, the layered terpene complexity that experienced palates pick out. Coco-grown flower from the same genetics tends to taste cleaner — terpene-forward, brighter, less rounded. Neither is wrong; they're different aesthetics.
The reason is the microbial ecosystem. Soil microbes produce a constant stream of secondary metabolites that the plant absorbs and incorporates into its terpene and flavonoid profiles. Coco's inert nature means the plant works only from mineral feed — no microbial side-products, no complex organic acid contributions. The flavour reflects only what you fed it.
Connoisseurs and craft cannabis growers strongly favour soil. Boutique growers in Mendocino, Vancouver Island micro-cultivators, Quebec craft circles default to organic soil because flavour complexity is core to their positioning. If you're growing for the experience of the smoke rather than the gram count, soil wins.
Commercial growers and high-volume home growers default to coco because cost-per-gram and predictability outweigh subtle flavour. The market doesn't reward subtle flavour at scale — it rewards consistency, yield, and visual quality. Coco delivers all three with less variability than soil.
The flush at the end of flowering matters more than most growers realize. A clean 7–10 day flush in coco produces flower with significantly less residual nutrient burn (the harsh, peppery, throat-coating burn) than an unflushed harvest. The same flush in soil is gentler because microbial action mineralizes residual nutrients on its own. Skip the flush in either medium and smoke quality drops noticeably.
Curing matters at least as much as substrate. A coco-grown flower cured 4–6 weeks in glass jars at 60–62% RH will out-taste a soil-grown flower cured 7 days in paper bags. Substrate sets the flavour ceiling; cure decides whether you hit it.
On specific terpenes: myrcene and pinene survive both mediums equally. Caryophyllene and limonene show subtle differences — soil-grown plants typically express 5–15% more of these terpenes by mass in lab analysis. Real differences, but small enough that they're often noise relative to genetic variation between phenos of the same strain.
For Canadian growers chasing flavour-first cultivation, the path is clear: organic soil, slow growth, conservative feeding, extended cure. For Canadian growers chasing maximum harvest weight at minimum cost-per-gram, coco wins. Both produce excellent cannabis — pick the definition of excellence you care about.
Common mistakes when running coco for the first time
Five mistakes account for roughly 80% of failed first-time coco grows. Each is preventable with awareness; each is catastrophic without it.
Skipping Cal-Mag. Coco's cation exchange chemistry binds calcium and magnesium and releases sodium and potassium in their place. Without 75–100 ppm Cal-Mag at every feed, rust spots show on mid-canopy leaves by day 18–25 of veg, progressing upward over the next two weeks. The fix is to add Cal-Mag immediately; the lost growth doesn't come back. Buy Cal-Mag with your nutrient line, not later.
Running soil-style EC and pH. New coco growers often use their old soil nutrient line, mix at soil-appropriate strength (1.0–1.2 EC), and pH to 6.5. Coco needs higher EC (1.4–2.0 in veg/flower) and lower pH (5.8–6.2). Wrong EC underfeeds and stunts; wrong pH locks out specific nutrients (iron at high pH, magnesium at low pH). Confirm coco targets before mixing.
Letting coco dry to bone-dry between waterings. Coco is forgiving when moist — it rehydrates instantly. When fully dry it becomes hydrophobic, water beads on the surface and runs off without rewetting. A bone-dry pot in late flower needs 2–3 slow passes before it accepts water again, during which the plant is starving. Water before the pot feels light; never let it go fully dry.
Overfeeding because growth is fast. Coco's faster veg tricks growers into feeding harder, assuming the plant needs more. The opposite is true at early stages — strong growth means the EC is right; bumping it to 1.6 in early veg burns young leaves. Stay on the EC ramp and increase only when runoff EC drops below input.
Reusing untreated coco. Coco can be reused but only if rinsed thoroughly (10 L per L of coco) and re-buffered with calcium nitrate solution. Skip this and salt buildup from the previous cycle locks out the new plant within 2 weeks. New growers often reuse their first batch without buffering, see immediate problems on cycle two, and incorrectly conclude that coco "doesn't work for them."
Additional gotchas worth knowing:
- Unbuffered cheap coco bricks. Generic coco from box stores often hasn't been buffered. Symptoms appear in 5–7 days as severe Cal-Mag deficiency. Pre-soak unknown coco in a 200 ppm calcium nitrate solution for 24 hours, then rinse. Trusted brands (Canna Coco, Plagron, Mother Earth Coco) come pre-buffered.
- Cold tap water. Canadian winter tap water hits coco at 8–12°C and shocks roots immediately. Let it sit an hour to warm, or use a small aquarium heater on the reservoir.
- Ignoring runoff EC. Coco runoff EC is your real-time gauge of medium health. If it climbs more than 0.3 above input, salt is building up — flush with pH'd water until runoff matches input within 0.1, then resume feeding.
- Pot too small. Coco's faster growth needs more root volume. A 3 L pot that works in soil becomes root-bound in coco within 18 days. Default to one size larger — 5 L for short cycles, 7–11 L for longer veg.
FAQ
Is coco coir considered organic?
Coco coir is a natural plant-derived material but it's not certified organic on its own and the nutrient lines used with it are almost always synthetic minerals. Some growers run coco with organic-derived liquids (General Organics, Roots Organics) and the result is functionally organic but not always certified. True living organic cultivation is easier in soil.
Can I use the same coco for two grows?
Yes, with rinsing and buffering between cycles. Run 10 L of fresh water per L of coco through the pot to flush salt buildup, then soak in a 200 ppm calcium nitrate solution for 24 hours to re-buffer. Mix in 20% fresh coco to restore structure. Beyond cycle two, structural breakdown reduces yields.
Does coco coir grow bigger buds than soil?
On average, yes — coco-grown cannabis yields 15–25% more dried flower than soil-grown at the same skill level. The difference comes from faster vegetative growth, more bud sites per plant, and tighter nutrient control. Soil can match coco's yield only with experienced organic amendments and extended cure.
What pH should coco coir be for cannabis?
5.8–6.2 at the root zone, slightly lower than soil's 6.2–6.8 target. The narrower window matters more in coco because pH drifts faster — daily checks are needed in coco, weekly checks suffice in soil. Outside the 5.8–6.2 zone, specific nutrient lockouts appear within 5–7 days.
Is coco coir good for autoflowering cannabis?
Coco works well for autoflowers and many growers prefer it for autos specifically — the faster vegetative window aligns with autoflower's compressed timeline. Use lower EC (0.8–1.4 throughout) than photoperiod plants because autos are more sensitive to nutrient excess. Soil's slow nutrient release is also a good match for autos but pace is slower.
What's the best coco coir brand in Canada?
Canna Coco Pro+, Plagron Cocos, and Mother Earth Coco are widely available through Canadian hydro shops and online (HTG Supply Canada, Eddi's Wholesale, Greenline Hydroponics). All three come pre-buffered and pre-washed. Avoid generic coco bricks from big-box garden stores unless you plan to buffer and rinse yourself.
19+ | Educational horticulture only.