
Master Your Indoor Grow
Indoor Growing Guides
Hydroponic Cannabis Growing for Beginners: The Complete Setup Guide
Complete DWC hydroponic cannabis setup guide for Canadian beginners: equipment, nutrients, pH/EC ranges, common mistakes, basement performance. Start for $150-300.
Hydroponic cannabis growing means growing your plants in oxygenated nutrient water instead of soil — and for beginners in Canada, a single-bucket Deep Water Culture (DWC) setup is the cheapest, fastest entry point. A complete 5-gallon DWC kit runs $150–$300 CAD, delivers roughly 20–30% faster veg and 15–25% bigger yields than soil, and lives quietly in a basement corner. The catch: if the air pump dies for 12 hours, your plants drown. This guide covers what to buy, what pH and EC ranges to hit, and how to avoid the three mistakes that kill 90% of first hydro grows. [CITATION: hydroponic vs soil yield comparison — Caplan, Dixon & Zheng, University of Guelph 2017]
Hydroponic cannabis growing means growing your plants in oxygenated nutrient water instead of soil — and for beginners in Canada, a single-bucket Deep Water Culture (DWC) setup is the cheapest, fastest entry point. A complete 5-gallon DWC kit runs $150–$300 CAD, delivers roughly 20–30% faster veg and 15–25% bigger yields than soil, and lives quietly in a basement corner. The catch: if the air pump dies for 12 hours, your plants drown. This guide covers what to buy, what pH and EC ranges to hit, and how to avoid the three mistakes that kill 90% of first hydro grows.
Hydroponics is the technique most home growers assume they can't handle — too technical, too expensive, too risky. None of that is true anymore. A modern DWC bucket, a pH pen, and an EC meter is roughly the same cost as a decent soil kit, and the learning curve is shorter than people pretend. What hydro actually demands is attention — checking water temperature, watching root colour, listening for the air pump — in exchange for plants that grow faster, eat cleaner, and finish with denser flower than anything you'll pull from a bag of pro-mix.
This guide is written for the Canadian basement grower running their legal four plants under ACMPR personal cultivation rules or the four-plant household limit (Quebec excepted). It assumes you've grown at least one cycle in soil or coco and you know what a fan leaf looks like in distress. By the end, you'll have a complete shopping list, the pH and EC numbers tattooed in your head, and an honest understanding of where DWC breaks.
What does "hydroponic" actually mean for cannabis growing?
Hydroponic cannabis growing is any cultivation method that delivers nutrients to the plant through water rather than soil. The roots sit either directly in oxygenated nutrient solution (Deep Water Culture, NFT, ebb-and-flow) or in an inert substrate like clay pebbles or rockwool that's flooded with nutrient water on a schedule. There's no organic medium feeding the plant — you feed the plant, exactly, every day.
The word covers a lot of ground. Deep Water Culture (DWC) suspends roots in an aerated reservoir — the simplest and most common beginner setup. Recirculating Deep Water Culture (RDWC) links multiple buckets so one shared reservoir feeds several plants. Nutrient Film Technique (NFT) flows a thin sheet of water along inclined channels. Drip systems like top-feed Dutch buckets pump nutrient water onto a coco or rockwool root mass. Aeroponics mists roots in midair. For a basement first-timer, ignore all of these except DWC — it's the cheapest, the most forgiving, and the easiest to diagnose when something goes wrong.
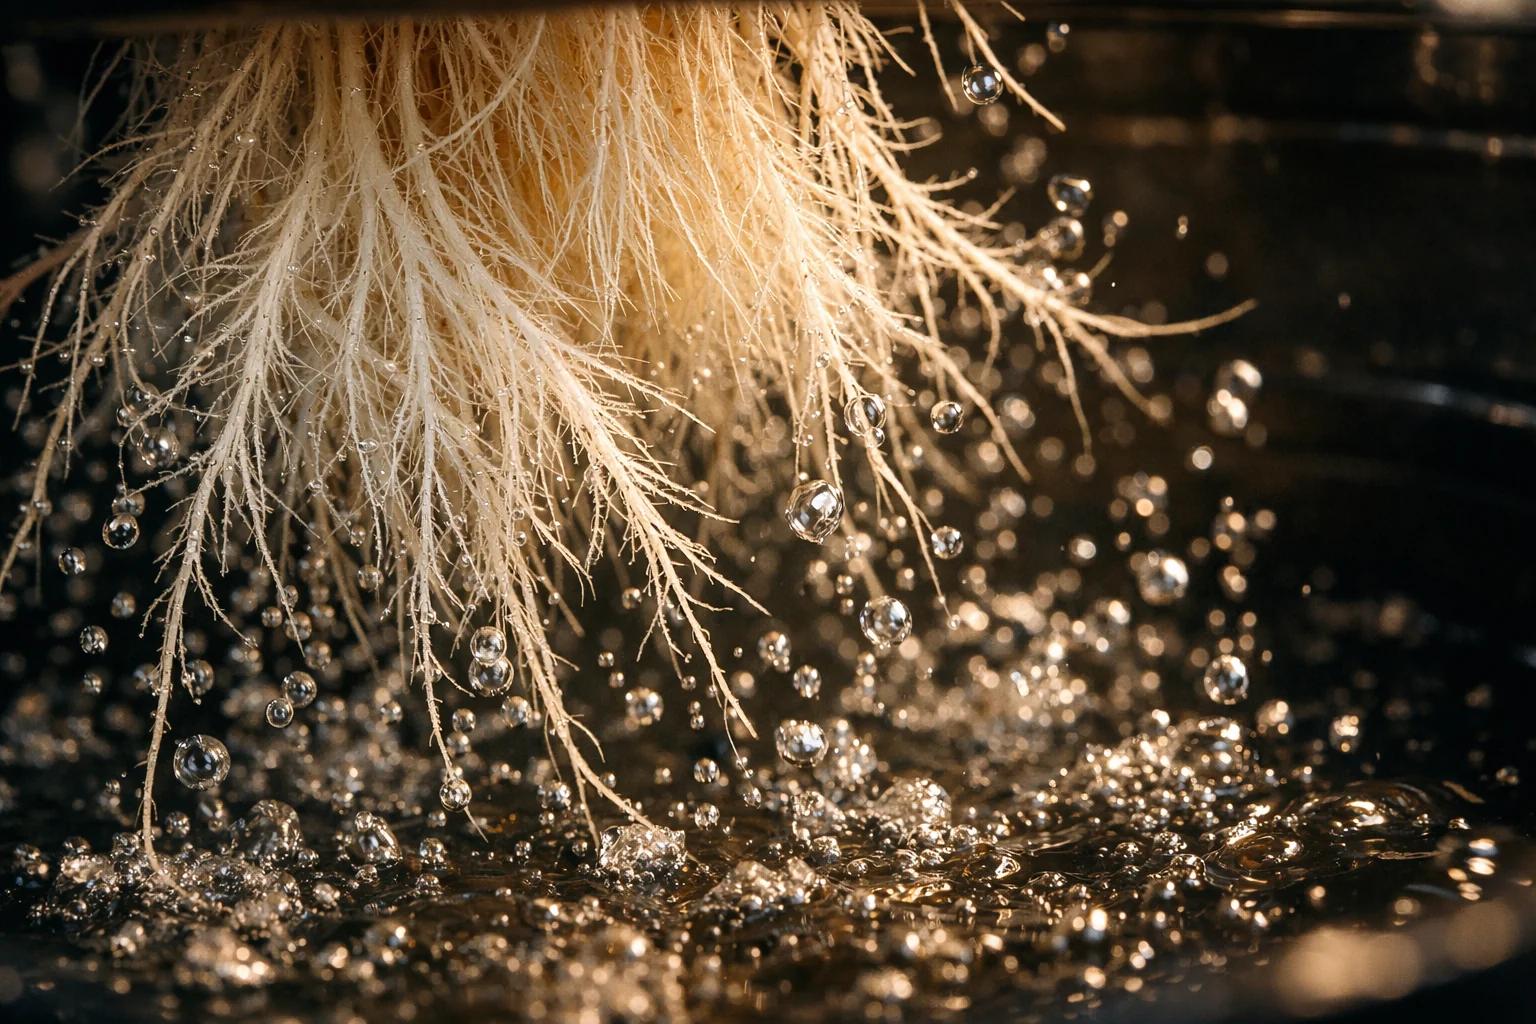
What unites every hydroponic method is oxygen at the root zone. Cannabis roots don't drink water — they breathe water. The dissolved oxygen in your reservoir is what lets the plant pull nutrients in, and the entire engineering of a DWC bucket exists to keep that oxygen level above 6 mg/L. Soil holds oxygen in its air pockets. Hydroponics holds oxygen in the water itself. Lose the oxygen and the plant drowns within hours. Picture this: you're running a 5-gallon DWC with twin air stones in a Sherbrooke basement at 18°C ambient, pump humming on a shelf above the bucket. The pump dies at 3 a.m. Saturday. By the time you walk down for Sunday coffee, dissolved oxygen has crashed from 8 mg/L to under 3, and the bottom 30% of the root mass is already turning beige. That's the entire margin between a clean harvest and a salvage operation.
How is hydroponic cannabis different from soil and coco?
Hydroponic cannabis grows roughly 20–30% faster through veg and yields 15–25% more dry flower per plant than the same genetics in soil, but it punishes mistakes that soil would absorb silently. The medium is the difference: soil acts as a buffer that smooths out pH drift, nutrient overdose, and watering errors. Hydroponics has no buffer. What you mix is what the plant gets.
Three practical differences you'll feel in week one:
- Feeding is constant, not periodic. In soil you water-then-feed-then-water. In DWC the plant sits in feeding solution 24/7, so concentration (EC) and balance matter more than timing.
- pH drifts faster. A soil pot might drift 0.2 pH points in a week. A DWC bucket can drift 0.5 in a day, especially during heavy uptake. You'll check pH daily.
- Problems show up in hours, not days. Yellowing in soil takes a week to diagnose. In hydro, a calcium lockout from pH drift can curl new growth overnight.
Coco coir sits between soil and hydro. It's technically hydroponic (coco itself contributes no nutrients), but it acts like a buffered medium — closer to soil in forgiveness, closer to hydro in speed. If hydroponics feels too high-stakes after reading this guide, coco is the honest middle ground. DWC is for growers who want maximum speed and accept the operational discipline that comes with it.
Which hydroponic system should beginners choose?
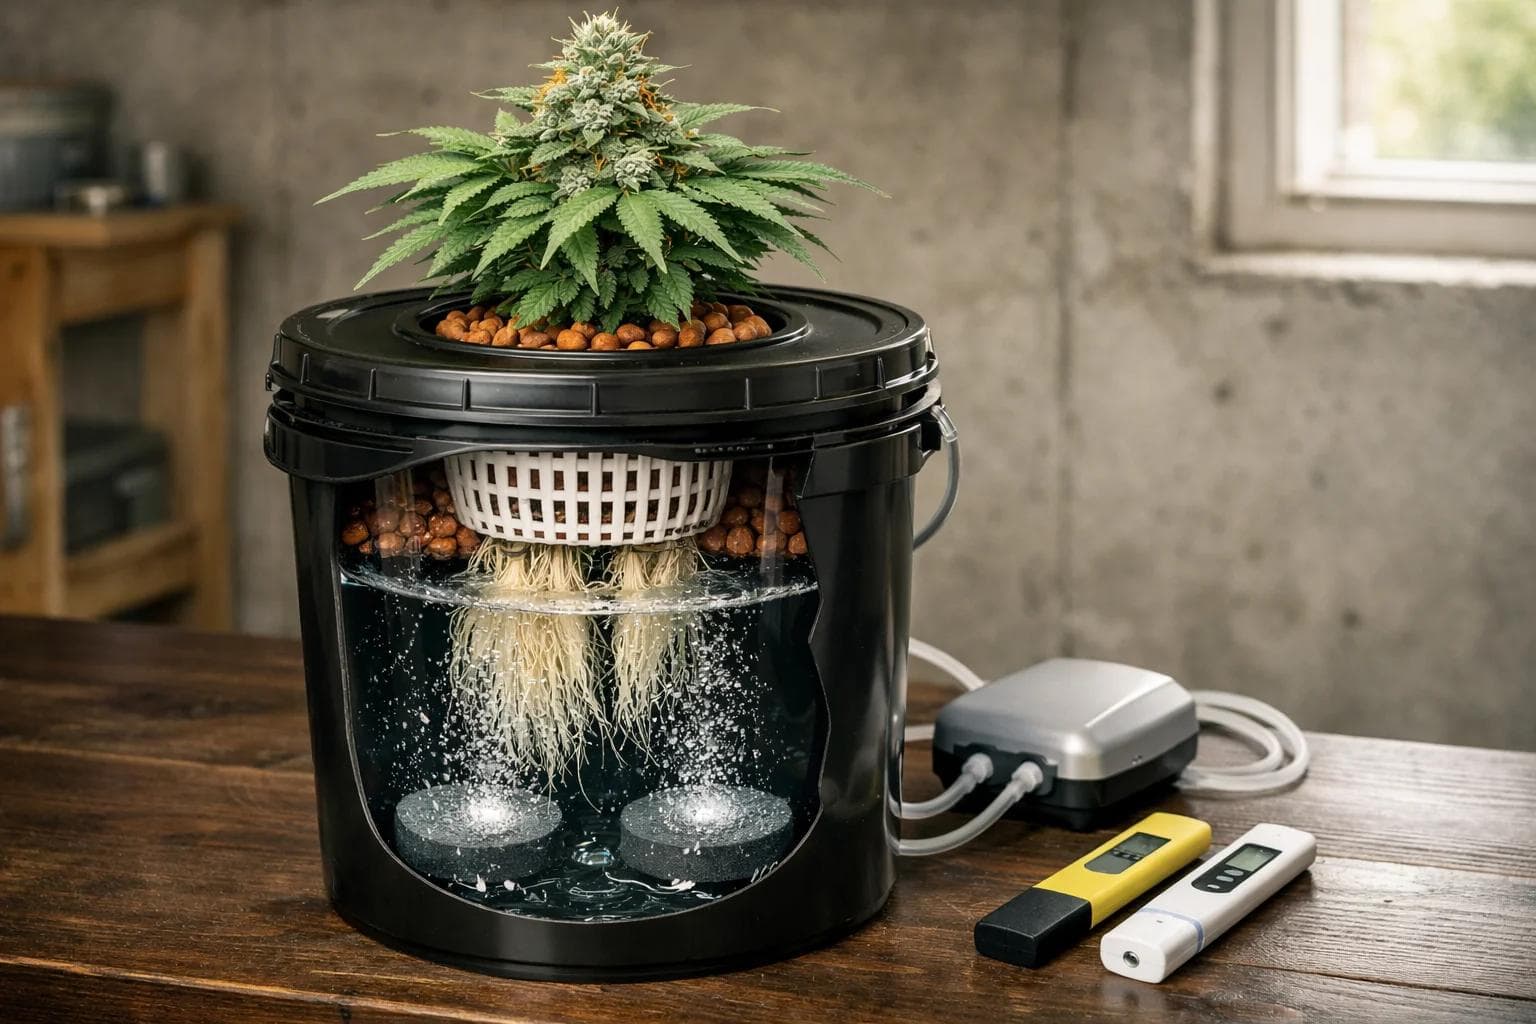
For a Canadian basement beginner running one to four plants, the answer is single-bucket DWC — one 5-gallon black bucket per plant, with its own air pump and air stones. Skip RDWC (more failure points), skip NFT (channel design matters too much), skip ebb-and-flow (timer-dependent), and skip drip systems (clog-prone). A standalone DWC bucket is mechanically simple, isolates each plant from neighbour problems, and costs under $100 in equipment per bucket.
The single-bucket DWC layout:
- 5-gallon (19 L) food-grade black plastic bucket with a snap-fit lid. Black blocks light from hitting the root zone.
- 6-inch net pot sunk into the bucket lid, holding the plant suspended above the water.
- Hydroton (clay pebbles) or rockwool cube around the seedling in the net pot.
- Air pump (minimum 4 W, ideally 8 W) running 24/7 outside the bucket.
- Two 4-inch round air stones sitting on the bucket floor, plumbed to the pump with silicone tubing and a check valve.
- Nutrient solution filling the bucket so the bottom 2–3 cm of the net pot sits in water until roots reach down.
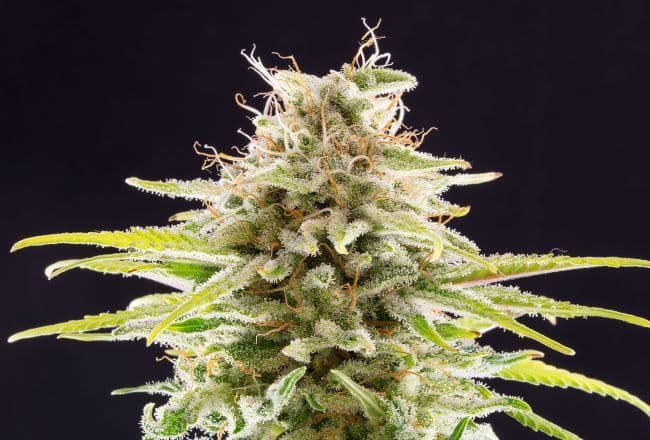
Feminized Seeds
Gorilla Glue #4 Feminized
What equipment do you actually need to start a DWC setup?
A complete starter DWC setup runs $150–$300 CAD for one plant, with the variation almost entirely driven by lighting. The hydroponic hardware itself — bucket, pump, stones, meters, nutrients — is under $200. Everything else is the environmental gear you'd need for any indoor grow.
Here's the honest shopping list for a single-bucket DWC, with realistic Canadian retail prices:
- 5-gallon black food-grade bucket with snap lid — $12 (Home Depot, Canadian Tire, Rona)
- 6-inch mesh net pot — $4 (hydro shop or Amazon Canada)
- Hydroton clay pebbles, 5 L bag — $20 (hydro shop)
- Dual-outlet air pump 6–8 W — $25–$40 (Hygger, EcoPlus on Amazon)
- Two 4-inch round air stones — $10
- Silicone airline tubing 3 m, check valve, T-splitter — $8
- Digital pH pen — $30–$60 (Apera AI209, BlueLab pH Pen)
- Digital EC/TDS pen — $30–$60 (BlueLab Truncheon, Apera EC60)
- pH Up / pH Down solution kit — $25 (General Hydroponics or Advanced Nutrients pH Perfect)
- Three-part hydroponic nutrients — $60–$90 (GH Flora trio, Advanced Nutrients Sensi Grow/Bloom)
- Cal-Mag supplement — $25 (non-negotiable — see nutrients section)
- Hanna or BlueLab calibration solutions — $15 (pH 4.0 + 7.0, EC 1.41 mS)
- 5 L RO water filter or 5-gallon jugs of distilled water — $30 one-time filter or $5/week for jugs
One non-obvious must-have: a second air pump as backup, sitting on the shelf. Air pumps are the failure point in DWC. When the primary pump dies (and it will — typically in year 2), the plants have 8–12 hours before the dissolved oxygen crashes and root rot starts. Pick a different model than your primary so a common-defect recall doesn't take out both — an Active Aqua AAPA15L paired with an EcoPlus 793 dual outlet is a popular Canadian basement combo. Having a spare ready to swap in costs $30 and saves an entire harvest.
For the grow environment itself — tent, lights, ventilation, temperature, humidity — the same rules apply as any indoor cannabis grow. Get the VPD targets right, follow a sensible photoperiod schedule, and keep the room between 22–26°C with 50–60% RH through veg.
How do you mix and manage hydroponic nutrients?
Hydroponic nutrients are mixed fresh into a reservoir of RO or distilled water, balanced to a target EC (electrical conductivity) for the growth stage, then adjusted to a target pH. You don't mix once and leave it — you check daily, top up evaporation losses with plain pH-balanced water, and do a full reservoir change every 7–10 days to reset accumulated salt buildup.
Start with a three-part nutrient line. The most common beginner-friendly Canadian options are General Hydroponics Flora trio (Micro/Grow/Bloom) or Advanced Nutrients Sensi (Grow A+B in veg, Bloom A+B in flower). Both come with feed charts printed on the bottle. Trust the feed chart at 50–60% strength for the first two weeks — full strength burns young roots fast.
The non-negotiable add-on is Cal-Mag. RO water has essentially zero calcium or magnesium, and hydroponic plants in pure RO will show calcium deficiency (rust-coloured spots on new leaves, twisted growth) within a week. Add 1 mL per litre of Cal-Mag to every reservoir change. This single bottle solves 80% of the deficiency problems beginners post on grow forums.
Mixing order matters. Add nutrients to water — never water to nutrients. Order:
- Fill bucket with RO water at room temperature.
- Add Cal-Mag first, stir.
- Add Micro (or Grow A), stir.
- Add Grow (or Grow B), stir.
- Add Bloom if in flowering stage, stir.
- Measure EC. Adjust by adding more nutrient or more water.
- Measure pH. Adjust with pH Up or pH Down drops.
- Re-measure both. Lock in.
- Check pH every morning. Adjust if drift exceeds 0.3 points from target.
- Check water level. Top up to maintain net pot contact for the first 10 days, then let the level drop as roots reach down.
- Check water temperature. Target 18–21°C — see the next section for why.
- Look at the roots through the lid lift. White and fluffy = healthy. Brown and slimy = root rot, act fast.
What pH and EC ranges does hydroponic cannabis need?
Hydroponic cannabis requires a tighter pH window than soil — 5.5 to 6.1 versus soil's 6.2–6.8 — and EC (electrical conductivity) targets ramp from 0.6 mS/cm at seedling up to 2.0–2.4 mS/cm in late flower. Drift outside these ranges causes nutrient lockout, where the plant can't absorb minerals even though the water is full of them.
The pH targets across the grow:
- Seedling and early veg (week 1–2): pH 5.8, EC 0.6–0.8 mS/cm
- Mid veg (week 3–4): pH 5.8, EC 1.0–1.4 mS/cm
- Late veg / pre-flip (week 5+): pH 5.8, EC 1.4–1.6 mS/cm
- Early flower (week 1–3): pH 5.8–6.0, EC 1.6–1.9 mS/cm
- Mid flower (week 4–6): pH 5.8–6.1, EC 1.8–2.2 mS/cm
- Late flower / ripening (week 7–8): pH 6.0–6.2, EC 1.5–2.0 mS/cm
- Flush (final 7–10 days): pH 6.0, EC 0.4–0.6 mS/cm (plain water + light Cal-Mag)
The "pH range" approach matters more than hitting one exact number. Cannabis roots actually benefit from natural drift between 5.5 and 6.1 over a 24-hour cycle, because different nutrients become maximally available at different pH points. Locking pH at exactly 5.8 with constant correction can actually starve the plant of trace minerals over time. Drift within range is healthy. Drift outside range is a problem.
The full cannabis pH guide covers correction methods, calibration schedules, and how to spot pH-driven deficiencies before they cost you flower mass.
EC discipline is where beginners get burned. Higher EC ≠ bigger plants. EC above 2.4 in flower causes salt buildup at the roots, locks out water uptake, and triggers a cascade of deficiency symptoms that look exactly like underfeeding (so panicked growers add more nutrients — and dig the hole deeper). When in doubt, go lower. A cannabis plant happily produces a respectable yield at EC 1.4 in flower. Pushing it to 2.4 only matters if the rest of your environment — light, temperature, CO2 — is dialed in to use that extra nutrient load.
Feminized Seeds
Bruce Banner Feminized
Why do hydroponic plants grow faster — and is the yield gain real?
Yes, the speed and yield gains are real and measurable — but they're not magic. Hydroponic plants grow faster because the roots never have to work for food. Soil roots spend significant biological energy hunting through the medium, secreting enzymes, partnering with microbes, and physically pushing through compaction. Hydroponic roots sit in a buffet. That redirected energy goes to canopy growth, internode density, and flower production.
The yield gain comes from two compounding factors:
- Faster veg → bigger plant frame at flip. A DWC plant in week 3 of veg has the canopy size of a soil plant in week 5. More bud sites at flip means more colas at harvest.
- Higher nutrient uptake efficiency. Hydroponic nutrient absorption sits around 90–95% versus 60–70% in soil. The plant gets more of what you feed it.
- Soil baseline: 80–110 g dry per plant
- DWC, first-time grower: 100–130 g dry per plant (15–25% gain)
- DWC, dialed-in second grow: 140–180 g dry per plant
- DWC, experienced + bigger light + SCROG: 200–280 g dry per plant
Training amplifies the hydro advantage. Because the plant has more vegetative energy to spend, LST and SCROG techniques work better in DWC than in soil — the plant recovers from training stress in 2–3 days instead of 5–7. A SCROG net over a single 5-gallon DWC bucket can produce 8–12 evenly developed colas at harvest, which is genuinely impressive for one plant.
Common beginner mistakes in hydro
The mistakes that kill first DWC grows are predictable, and almost all of them trace back to two root causes: letting water temperature climb above 22°C, and not having backup systems. Everything else is a downstream symptom.
The top failure modes, ranked by frequency:
- Water temperature above 22°C. Warm water holds less dissolved oxygen, and at 24°C+ you're in Pythium (root rot) territory. Roots turn brown, slimy, and smell rotten within 48 hours. Fix: reservoir chiller ($150), or simpler — frozen water bottles rotated into the reservoir 2x daily, or move the bucket to the coolest basement spot.
- Air pump failure undetected. Pump dies overnight, dissolved oxygen crashes, roots suffocate. By morning the plant is wilted and rot has started. Fix: $20 backup pump on the shelf + a habit of checking bubble intensity every morning.
- pH drift not corrected daily. Beginners check pH weekly. By day 4, pH has climbed to 6.8 and calcium has been locked out for three days. Fix: morning coffee = pH check. Non-negotiable.
- Overfeeding from day one. Feed charts on bottles are aimed at commercial growers with optimized environments. At full strength in a basement setup, you'll burn the plant by week 2. Fix: 50% strength for the first two weeks, ramp up only if the plant shows hunger (lower-leaf fade).
- Using tap water without testing. Canadian municipal tap can run EC 0.4 with chlorine and chloramine that kill beneficial root microbes and nuke any organic root inoculant. Fix: RO water or filtered jugs. Always.
- Skipping the reservoir change. Salts build up, EC reads "normal" but the salt profile is wildly imbalanced. Fix: full reservoir flush every 7 days during veg, every 5 days during flower. New water, new nutrients, fresh start.
- Topping or training too aggressively in early veg. Hydroponic recovery is faster, but the plant still needs an established root mass before you stress it. Fix: wait until roots reach the bottom of the bucket (visible through the net pot) before any training cuts.
- Ignoring root colour. Brown or beige roots = early root rot. By the time leaves yellow, you've already lost a week of growth. Fix: lift the lid every 2–3 days and look. White and fluffy = win. Any other colour = investigate immediately.
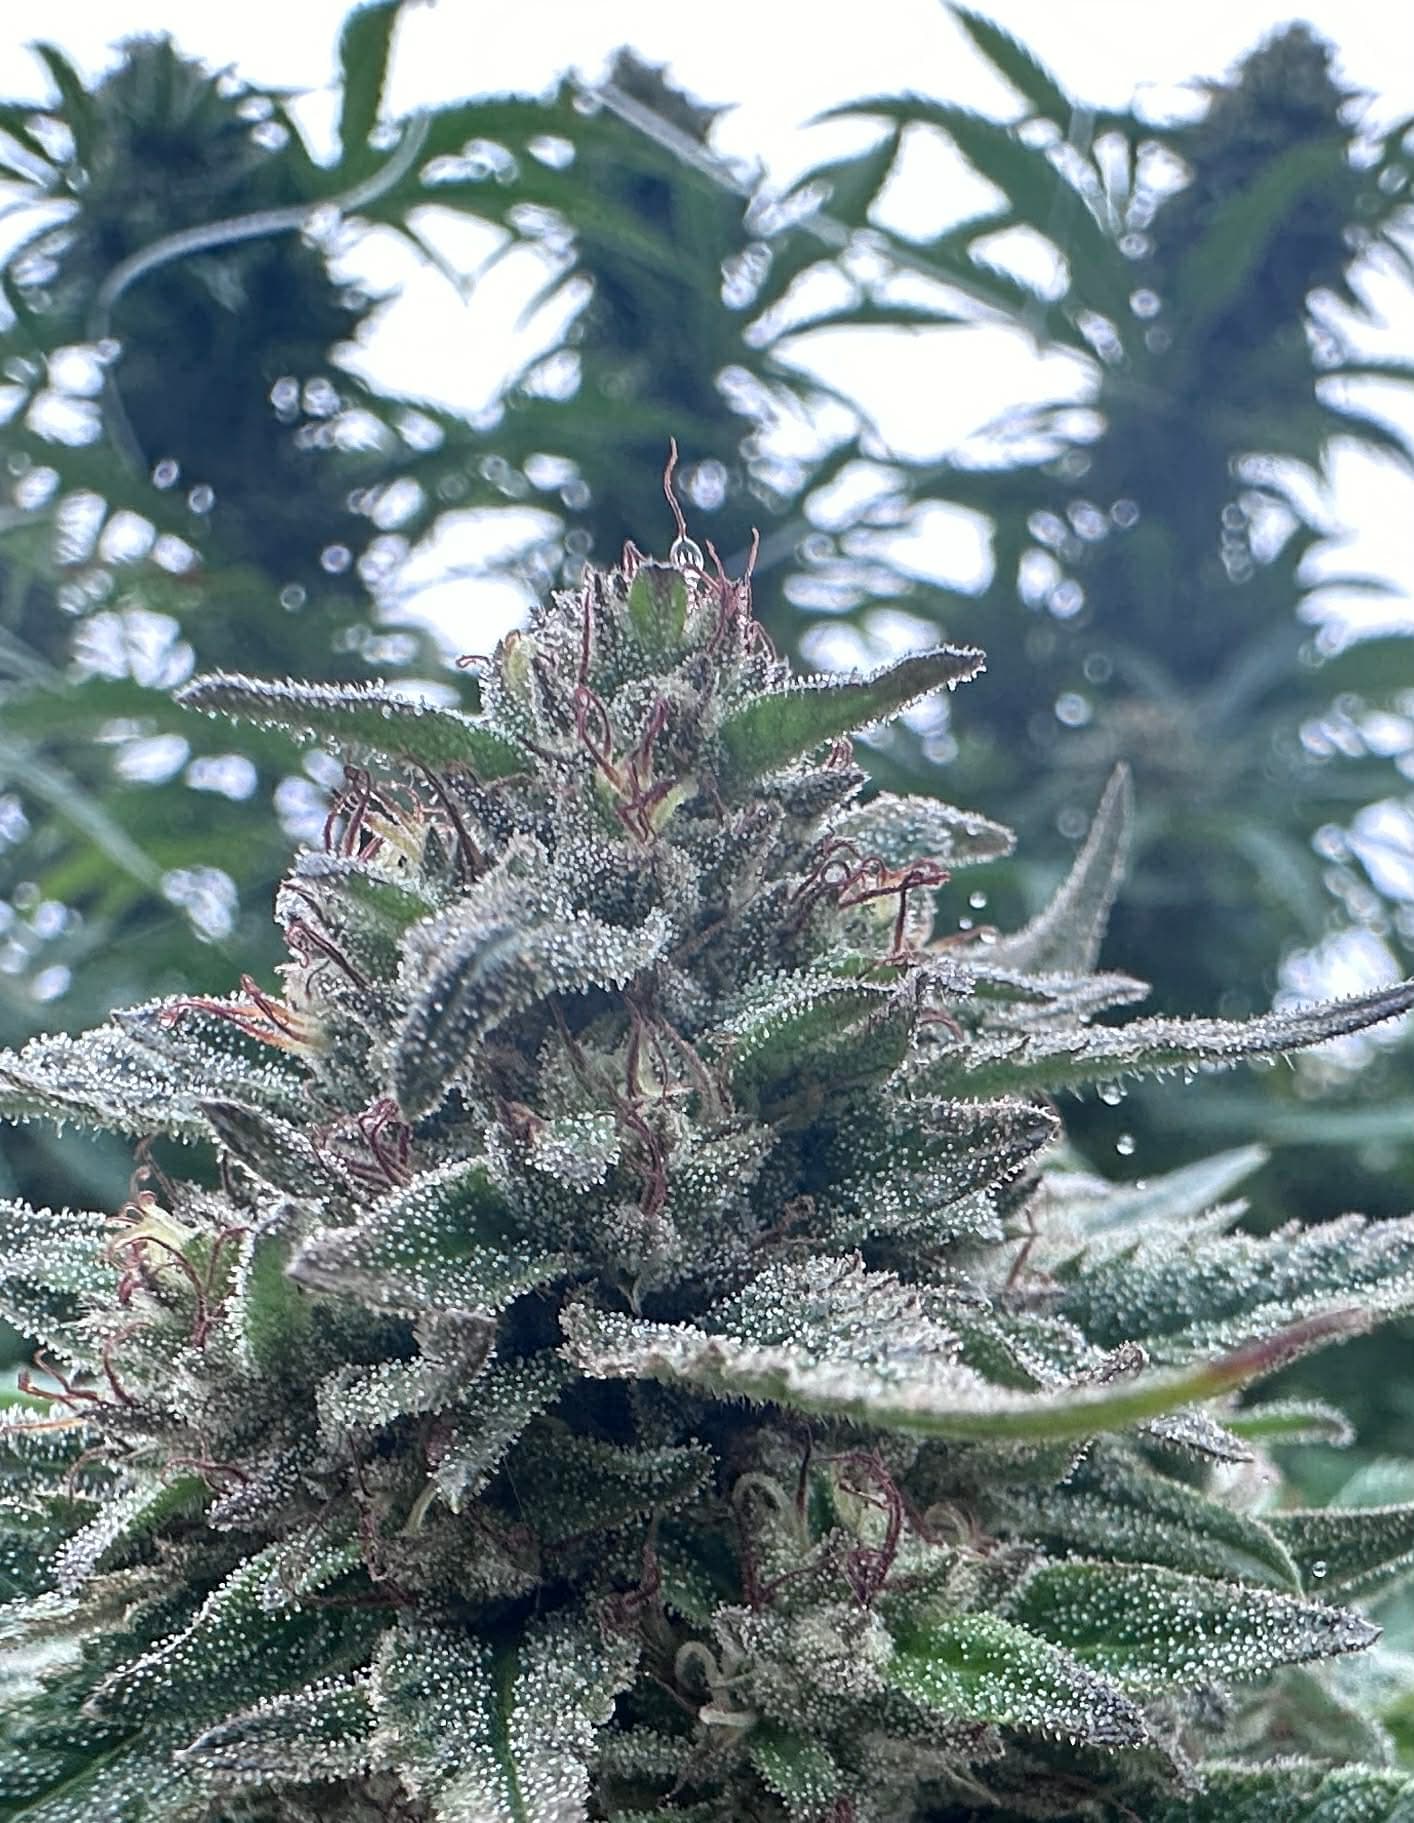
Healthy hydroponic roots are bright white, fluffy, and grow visibly thicker by the day. The cannabis root health guide covers what each colour shift means and how to recover plants in the early stages of rot.
How does hydro perform in a Canadian basement or grow tent?
Canadian basements are arguably the ideal DWC environment in the world. The natural underground temperature sits between 14 and 19°C year-round, which keeps reservoir water in the sweet spot without a chiller — saving you $150 and a noisy piece of equipment. Add a 2x4 or 4x4 grow tent for canopy environmental control, and you've got a stable, low-cost hydroponic operation that runs through Canadian winters without breaking a sweat.
The basement advantages, specifically:
- Cool reservoir = high dissolved oxygen without chiller costs. Most Canadian basements hold 16–19°C floor temperature year-round.
- Stable humidity (40–55% naturally) in most basements, which sits close to optimal flowering RH.
- Hidden, sound-isolated for the air pump's continuous hum.
- Easy floor drainage in unfinished basements for reservoir changes.
- Cold floor cools the bucket too much in winter. If reservoir drops below 16°C, root growth slows. Fix: elevate the bucket on a wooden plank or a styrofoam panel to break thermal contact with the concrete.
- High humidity in damp basements. Anything above 60% RH in flower invites bud mold. Fix: small dehumidifier in the tent during flowering, or run flowering in a dryer season.
- CO2 stagnation in sealed basements. Modern basements with closed-cell foam insulation can run low on fresh air. Fix: inline exhaust fan venting outside (where possible) or to another room.
- 2x4 grow tent, 200 W full-spectrum LED, 4-inch inline exhaust + carbon filter
- One 5-gallon DWC bucket, single plant, dual 4-inch air stones, 8 W dual-outlet pump
- pH pen, EC pen, RO filter or 5-gallon water jugs
- Temperature 22–25°C ambient, 18–21°C reservoir, 50–60% RH
- 18/6 light schedule in veg, 12/12 in flower

This setup runs about $400–$600 CAD all-in for the first plant, including the tent and lighting. Per-cycle consumables (nutrients, RO water, replacement air stones) run $30–$50. At 140 g dry yield per cycle in a dialed-in second run, that's roughly $1.50 per gram of personal-grow flower at full cost amortization — well below SQDC and OCS retail prices, with the genetics you actually want.
Feminized Seeds
OG Kush Feminized
FAQ
Can I run DWC with autoflowers?
Yes, but with caveats. Autoflowers in DWC can finish in 65–75 days seed to harvest, which is impressive. The catch is that autos can't recover from any major stress event the way photos can — and DWC has more stress vectors (pH crash, temperature spike) than soil. Plan it as your second hydro grow, not your first. Use the [autoflower growing guide](/en/articles/cannabis-light-schedule-guide) for veg and flower timing on a single 18/6 or 20/4 cycle from start to finish.
Do I need a reservoir chiller?
Probably not in a Canadian basement. If reservoir temperature climbs above 22°C, you have three options before buying a chiller: move the bucket to the coolest floor spot, elevate it on a thermal break, or rotate two frozen water bottles into the reservoir 2x daily. Chillers ($150–$300) are worth it for summer attic grows, multi-bucket RDWC, or anyone in a heated-floor basement.
How often do I change the water?
Full reservoir change every 7 days during veg, every 5–6 days during peak flower. Top up daily with plain pH-balanced RO water to replace evaporation. The salt buildup from continuous topping-up without flushing is what causes "mystery deficiencies" in week 5 of flower — even if your EC reads normal.
What happens if the air pump dies overnight?
You have 8–12 hours of safety before dissolved oxygen drops to root-damaging levels, and another 24 hours before *Pythium* gets a foothold. If you catch it within the safety window (morning pump check), swap to backup pump, do a small partial water change to refresh oxygen, and the plant recovers. If you miss it for a full day, expect a 1–2 week stall and possible loss of the plant. Backup pumps are cheap. Own one.
Can I clone in DWC?
Yes, and it works beautifully — clones in DWC root in 5–7 days under a humidity dome with a small air stone in the cloning reservoir. The vegetative speed advantage compounds: a hydro clone hits transplant size in 10 days versus 14–18 in soil or rockwool.
Is hydroponic cannabis "cleaner" than soil?
Modern hydro grown with synthetic nutrients produces flower indistinguishable from organic-soil flower in lab testing, provided you flush properly in the final 7–10 days. The "harsh hydro" reputation comes from old growers who skipped the flush. Pull EC down to 0.4–0.6 in the last week, run plain pH-balanced water for the final 2–3 days, and your hydro flower will burn smooth and taste clean.
19+ | Educational horticulture only.